Loading manual…
Whirlpool 1.1 Cu. Ft. Over The Range Microwave Hood (WMMF5930PV) installation instructions
- Type
- Installation instructions
- Languages
- English, Spanish
- Pages
- 40
- Category
- Refrigerators & freezers
- Models
- CARE................................................................
Open PDFOpens the file on content.abt.com.
Contents
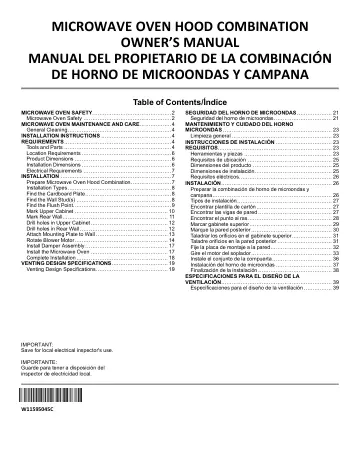
- MICROWAVE OVEN SAFETYp. 2
Your safety and the safety of others are very important. We have provided many important safety messages in this manual and on your appliance. Always read and…
- Microwave Oven Safetyp. 2
- MICROWAVE OVEN MAINTENANCE AND CAREp. 4
General Cleaning IMPORTANT: Before cleaning, make sure all controls are off and the microwave oven is cool. Always follow label instructions on cleaning…
- General Cleaningp. 4
IMPORTANT: Before cleaning, make sure all controls are off and the microwave oven is cool. Always follow label instructions on cleaning products. Soap, water…
- INSTALLATION INSTRUCTIONSp. 4
- REQUIREMENTSp. 4
Tools and Parts Tools Needed n Measuring tape n Pencil n Scissors n Masking tape or thumbtacks n Drill n No. 2 Phillips screwdriver n Stud finder n No. 3…
- Tools and Partsp. 4
Tools Needed n Measuring tape n Pencil n Scissors n Masking tape or thumbtacks n Drill n No. 2 Phillips screwdriver n Stud finder n No. 3 Phillips screwdriver…
- Location Requirementsp. 6
Check the opening where the microwave oven will be installed. The location must provide: n Minimum
- Product Dimensionsp. 6
- Installation Dimensionsp. 6
See the “Installation Dimensions” illustration. n Minimum one 2" x 4" (51 x 102 mm) wood wall stud and minimum 3/8" (10 mm) thickness drywall or plaster/lath…
- Electrical Requirementsp. 7
WARNING Electrical Shock Hazard Plug into a grounded 3 prong outlet. Do not remove ground prong. Do not use an adapter. Do not use an extension cord. Failure…
- INSTALLATIONp. 7
height. **30" (762 mm) is typical for 66" (1676 mm) installation height. ***12" (305 mm) to 12.75" (320 mm) cabinets, the microwave oven is bulge to the…
- Prepare Microwave Oven Hood Combinationp. 7
WARNING Excessive Weight Hazard Use two or more people to move and install or uninstall appliance. Failure to do so can result in back or other injury. 1. To…
- Installation Typesp. 8
This microwave oven is designed for adaptation to the following three types of ventilation, choose one type before installation. Recirculation (Factory Default…
- Find the Cardboard Platep. 8
The cardboard plate is used as wall template and upper-cabinet template. It is located on the outer foam in the carton. Find it before installation
- Find the Wall Stud(s)p. 8
NOTE: If no wall studs exist within the cabinet opening, do not install the microwave oven. See illustrations in “Possible Wall Stud Configurations.” 1. Using…
- Find the Flush Pointp. 9
This product is designed to flush the cabinet, and the flush point before installation. Don't install the microwave oven behind the cabinets. Flush to Cabinet…
- Mark Upper Cabinetp. 10
1. Using measuring tape, and clearly mark the vertical centerline of the opening. Make sure it is align with the vertical wall centerline. A B A. Upper Cabinet…
- Mark Rear Wallp. 11
The microwave oven must be installed on a minimum of 1 wall stud, preferably 2, using a minimum of 1 lag screw, preferably 2. See “Find the Wall Stud(s)”…
- Drill holes in Upper Cabinetp. 12
1. Using a drill, cut out the power cord hole (A). 2. Drill two mounting nut holes (B), which are 3/8" (10 mm) holes at points “D” and “E” on the cardboard…
- Drill holes in Rear Wallp. 12
1. The mounting plate is located inside the inner foam in the cavity, take it out. The mounting plate is folded, open it to 180 degree at plate. 2. Attach the…
- Attach Mounting Plate to Wallp. 13
1. Position mounting plate on the wall. 2. Secure the mounting plate to the wall at both end holes drilled into the wall studs and/or drywall using either…
- Rotate Blower Motorp. 14
This section include wall and roof venting installation, both venting installation need rotate blower motor, select one ventilation type before install the…
- Install Damper Assemblyp. 17
If for recirculation installation, no need to install the damper assembly, this section can be skip. And save it for future use. Install Damper Assembly for…
- Install the Microwave Ovenp. 17
- Complete Installationp. 18
1. Check that all parts are now installed. If there is an extra part, go back through the steps to see which step was skipped. 2. Dispose of/recycle all…
- VENTING DESIGN SPECIFICATIONSp. 19
This section is intended for architectural designer and builder/contractor reference only. NOTES: n Vent materials needed for installation are not provided…
- Venting Design Specificationsp. 19
- SEGURIDAD DEL HORNO DE MICROONDASp. 21
Su seguridad y la de los demás son muy importantes. Hemos incluido muchos mensajes importantes de seguridad en este manual y en su electrodoméstico. Lea y…
- Seguridad del horno de microondasp. 21
Other documents for this model
- Whirlpool ADA 21 Cu. Ft. Side By Side Refrigerator 33 Inch Wide Fingerprint Resistant Blac (WRS321SDHV) installation instructions
- Whirlpool 19.14 Cu. Ft. 4 Door Refrigerator Counter Depth 36 Inch Wide (WRQC7836RZ) installation instructions
- Whirlpool 2.1 Cu. Ft. Over the Range Microwave (WMMS5630TZ) installation instructions
- Whirlpool 24 Black Convection Wall Oven (WOS52ES4MB) user manual
- Whirlpool 24 Black Heavy Duty Portable Dishwasher (WDP370PAHB) user manual
- Whirlpool 24 Black Large Capacity Dishwasher (WDT750SAKB) installation instructions
- Whirlpool 24 Black Large Capacity Dishwasher (WDTA50SAKB) installation instructions
- Whirlpool 24 In. Stainless Steel Freestanding Electric Range (WFE500M4HSS) user manual
- Whirlpool 30 Cu. Ft. French Door Refrigerator (WRFF3736SV) installation instructions
- Whirlpool 4.5 Cu. Ft. White Ventless All (WFC682CLW) installation instructions