Loading manual…
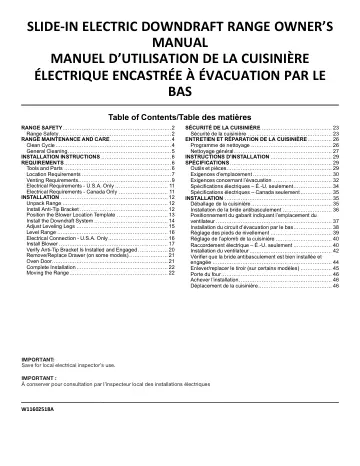
JennAir ADA RISE 30 In. Stainless Steel Slide (JES1750ML) installation instructions
- Type
- Installation instructions
- Languages
- English, French
- Pages
- 48
- Category
- Ovens & ranges
- Models
- JES1750MLRE................
Open PDFOpens the file on content.abt.com.
Contents
- RANGE SAFETYp. 2
Your safety and the safety of others are very important. We have provided many important safety messages in this manual and on your appliance. Always read and…
- Range Safetyp. 2
- RANGE MAINTENANCE AND CAREp. 4
- Clean Cyclep. 4
If your oven cavity is above 200°F (93°C), it will appear in the display, and the Clean cycle will not be activated until the oven cavity cools down. To Clean…
- General Cleaningp. 5
IMPORTANT: Before cleaning, make sure all controls are off and the oven and cooktop are cool. Always follow label instructions on cleaning products. Soap…
- INSTALLATION INSTRUCTIONSp. 6
- REQUIREMENTSp. 6
Tools and Parts Gather the required tools and parts before starting installation. Read and follow the instructions provided with any tools listed here. Tools…
- Tools and Partsp. 6
Gather the required tools and parts before starting installation. Read and follow the instructions provided with any tools listed here. Tools needed n Tape…
- Location Requirementsp. 7
IMPORTANT: Observe all governing codes and ordinances. Do not obstruct flow of combustion and ventilation air. n It is the installer’s responsibility to comply…
- Venting Requirementsp. 9
IMPORTANT: This range must be exhausted outdoors unless you are using ductless venting. See the “Venting Methods” section. n Do not terminate the vent system…
- Electrical Requirements - U.S.A. Onlyp. 11
If codes permit and a separate ground wire is used, it is recommended that a qualified electrical installer determine that the ground path and wire gauge are…
- Electrical Requirements - Canada Onlyp. 11
WARNING Electrical Shock Hazard Electrically ground appliance. Failure to do so could result in death, fire, or electrical shock. If codes permit and a…
- INSTALLATIONp. 12
Unpack Range WARNING Excessive Weight Hazard Use two or more people to move and install or uninstall appliance. Failure to do so can result in back or other…
- Unpack Rangep. 12
WARNING Excessive Weight Hazard Use two or more people to move and install or uninstall appliance. Failure to do so can result in back or other injury. 1.…
- Install Anti-Tip Bracketp. 12
WARNING Tip Over Hazard A child or adult can tip the range and be killed. Install anti-tip bracket to floor or wall per installation instructions. Slide range…
- Position the Blower Location Templatep. 13
1. Determine and mark the centerline on the floor of the cabinet opening. A A. Centerline 2. Locate the blower location template in the Installation Parts Kit.…
- Install the Downdraft Systemp. 14
Determine which venting method to use: floor or rear wall venting. Go to the section for your type of venting. Consider the location of all utilities and ducts…
- Adjust Leveling Legsp. 15
1. If range height adjustment is necessary, use a wrench or pliers to loosen the 4 leveling legs. This may be done with the range on its back or with the range…
- Level Rangep. 16
1. Place level on the oven bottom, as indicated in one of the two figures below, depending on the size of the level. Check with the level side to side and…
- Electrical Connection - U.S.A. Onlyp. 16
If your home has a 4-wire direct connection, go to “Install Using Direct Wire”. Install Using Direct Wire WARNING Electrical Shock Hazard Disconnect power…
- Install Blowerp. 17
Cover 1. Locate blower motor cover. 2. Run the blower motor wires with strain relief through the small opening in the blower motor cover, starting from the…
- Verify Anti-Tip Bracket Is Installed and Engagedp. 20
On Ranges Equipped with a Premium Storage Drawer: 1. Slide range into final location, making sure rear leveling leg slides into anti-tip bracket. 2. Remove the…
- Remove/Replace Drawer (on some models)p. 21
Remove all items from inside the baking drawer, and then allow the range to cool completely before attempting to remove the drawer. To Remove: 1. Open the…
- Oven Doorp. 21
For normal range use, it is not suggested to remove the oven door. However, if removal is necessary, make sure the oven is off and cool. Then, follow these…
- Complete Installationp. 22
1. Check that all parts are now installed. If there is an extra part, go back through the steps to see which step was skipped. 2. Check that you have all of…
- Moving the Rangep. 22
- SECURITE DE LA CUISINIEREp. 23
SÉCURITÉ DE LA CUISINIÈRE Votre sécurité et celle des autres sont très importantes. Nous donnons de nombreux messages de sécurité importants dans ce manuel et…
- Sécurité de la cuisinièrep. 23
Votre sécurité et celle des autres sont très importantes. Nous donnons de nombreux messages de sécurité importants dans ce manuel et sur votre appareil.…
- ENTRETIEN ET REPARATION DE LA CUISINIEREp. 26
- Programme de nettoyagep. 26
La technologie AquaLift® est une formule de nettoyage innovante qui utilise l’eau et la chaleur pour désincruster les traces de renversements du four en moins…
Other documents for this model
- JennAir RISE 30 In. Stainless Steel Slide (JGS1450ML) installation instructions
- JennAir NOIR 36 In. Floating Glass Black (JGRP436HM) installation instructions
- JennAir NOIR 36 In. Stainless Steel Dual Fuel Professional Range (JDRP436HM) installation instructions
- JennAir NOIR Induction Professional Range 36 Inch Wide (JPIFC736RM) installation instructions
- JennAir NOIR Induction Professional Range 36 Inch Wide (JPIFC736RM) installation instructions
- JennAir NOIR Professional Induction Range 30 Inch (JPIFC730RM) installation instructions
- JennAir NOIR Professional Induction Range (JPIGC748RM) installation instructions
- JennAir Smoke Brass Dual Fuel Professional Range (TANKMAN50) installation instructions