Loading manual…
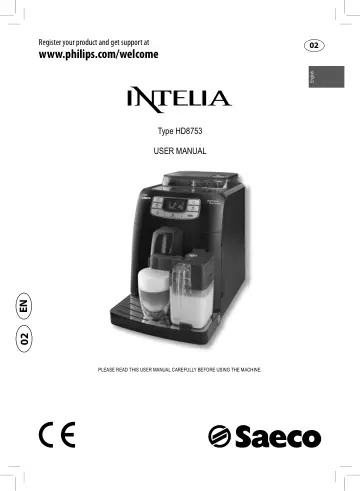
Philips Intelia HD8753/87 Super-automatic espresso machine user manual
Open PDFOpens the file on objects.icecat.biz.
Contents
- IMPORTANTp. 6
Safety instructions This machine is equipped with safety features. Nevertheless read the safety instructions carefully and only use the machine as described in…
- Safety instructionsp. 6
This machine is equipped with safety features. Nevertheless read the safety instructions carefully and only use the machine as described in these instructions…
- Warningp. 6
and this sign warn against possible severe injuries, danger to life and/or damage to the machine. The term CAUTION and this sign warn against slight injuries…
- Cautionp. 7
The machine is for household use only. It is not intended for use in environments such as staff kitchens of shops, offi ces, farms or other work environments.…
- INSTALLATIONp. 8
- Product overviewp. 8
- General descriptionp. 9
1. Grinder adjustment knob 2. Pre-ground coff ee compartment 3. Coff ee bean hopper 4. Coff ee bean hopper lid 5. Control panel 6. Dispensing spout 7. Full…
- PREPARING FOR USEp. 10
Machine packaging The original packaging has been designed and constructed to protect the machine during transport. We recommend keeping the packaging material…
- Machine packagingp. 10
The original packaging has been designed and constructed to protect the machine during transport. We recommend keeping the packaging material for possible…
- Machine installationp. 10
Remove the drip tray with grill from the packaging. 2 Remove the machine from the packaging. 3 For best use, it is recommended to: • Choose a safe, level…
- USING THE MACHINE FOR THE FIRST TIMEp. 12
When using the machine for the fi rst time, the following activities need to happen: 1) You need to prime the circuit 2) The machine will perform an automatic…
- Circuit primingp. 12
During this process fresh water fl ows through the internal circuit of the machine and the machine warms up. This takes a few minutes. 1 Place a container…
- Automatic rinse/self- cleaning cyclep. 13
ENGLISH 11 2 Press the “ ” button to start the cycle. The machine starts the automatic priming of the circuit by dispensing some water through the dispensing…
- Manual rinse cyclep. 14
During this process you activate the coff ee brewing cycle and fresh water fl ows through dispensing spout. This takes a few minutes. 1 Place a container under…
- Measuring and programming water hardnessp. 16
Measuring water hardness is very important for defi ning the frequency in which the machine has to be descaled and to install the “INTENZA+” water fi lter (for…
- Replacing the “INTENZA+” water fi lterp. 18
When the “INTENZA+” water fi lter needs to be replaced with a new one, the following icon is displayed. 1 Replace the fi lter as described in the previous…
- ADJUSTMENTSp. 20
The machine allows for certain adjustments so that you can brew the best tasting coff ee possible
- Saeco Adapting Systemp. 20
Coff ee is a natural product and its characteristics may change according to its origin, blend and roast. The machine is equipped with a self-adjusting system…
- Adjusting the ceramic coff ee grinderp. 20
Ceramic coff ee grinders always guarantee accurate grinding for every coffee blend and prevent the beans from overheating. This provides for full aroma…
- Adjusting the aroma (coff ee strength)p. 21
Choose your favorite coff ee blend and adjust the amount of coff ee to be grounded until they meet your personal taste. You can also select the preground coff…
- Adjusting the dispensing spoutp. 22
The height of the dispensing spout can be adjusted to better fi t the dimensions of the cups that you wish to use. Move the dispensing spout up or down with…
- Adjusting the coff ee lengthp. 23
The machine allows you to adjust the amount of brewed coff ee according to your taste and/or the size of your cups. Each time the “ ” or “ ” button is pressed…
- ESPRESSO AND COFFEE BREWINGp. 24
Before brewing coff ee, make sure that there are no warnings shown on the display, and that both, water tank and coff ee bean hopper are fi lled
- Espresso and coff ee brewing using coff ee beansp. 24
Place 1 or 2 cups under the dispensing spout. Green Green 2 To brew an espresso or a coff ee, press the “ ” button to select the desired aroma. 3 Press the “ ”…
- Espresso and coff ee brewing using pre-ground coff eep. 25
This function allows to use pre-ground and decaff einated coff ee. With the pre-ground coff ee function you can only brew one coff ee at a time. 1 Press the “…
- MILK CARAFEp. 26
This chapter explains how to use a milk carafe to prepare a cappuccino or hot milk. Note: Before using the milk carafe, clean it thoroughly as described in the…
- Filling the milk carafep. 26
The milk carafe can be fi lled before use or even during use. 1 Lift the top of the carafe as shown in the fi gure. 2 Pour the milk into the milk carafe: the…
- Inserting the milk carafep. 27
If installed, remove the water dispenser as shown in the fi gure: - Press the two buttons on the side to unlock it and lift it slightly; - Pull the water…
- Removing the milk carafep. 28
Rotate the carafe upwards until it releases from the insert in the drip tray. 2 Pull away from the machine until it is completely detached. 3 Close the milk…
- Emptying the milk carafep. 28
Press the release buttons to allow the lid removal. 2 Lift the lid. Empty the milk carafe and clean it properly. Note: After each use, clean the milk carafe as…