Loading manual…
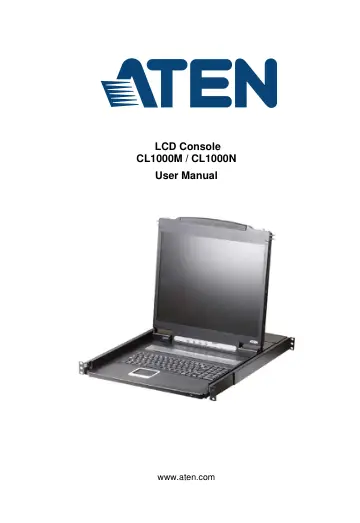
ATEN LCD Console (CL1000M) user manual
- Type
- User manual
- Language
- English
- Pages
- 52
- Category
- Docks & adapters
- Models
- CL1000N
Open PDFOpens the file on objects.icecat.biz.
Contents
- Introductionp. 11
Overview The CL1000M / CL1000N is a LCD KVM console that features an integrated 17” (CL1000M) or 19” (CL1000N) LED-backlit LCD panel, full keyboard, and…
- Overviewp. 11
The CL1000M / CL1000N is a LCD KVM console that features an integrated 17” (CL1000M) or 19” (CL1000N) LED-backlit LCD panel, full keyboard, and touchpad in a…
- Featuresp. 12
Exclusive LED illumination light - designed by ATEN to illuminate the keyboard and touchpad to allow visibility in low-light conditions Integrated KVM…
- Requirementsp. 13
Switches and Computers The CL1000M / CL1000N supports most KVM switches that have PS/2 console port connectors. If you are unsure whether your switch is…
- Componentsp. 14
CL1000M Front View No. Component Description 1 Handle Pull to slide the KVM module out; push to slide the module in. 2 Slide Release In order to slide the…
- Hardware Setupp. 19
- Before you Beginp. 19
CL1000M Standard Rack Mounting A standard rack mount kit is provided with your CL1000M. The kit enables the console to be mounted in rack with a depth of 42–72…
- CL1000M Standard Rack Mountingp. 19
A standard rack mount kit is provided with your CL1000M. The kit enables the console to be mounted in rack with a depth of 42–72 cm. Note: 1. It takes two…
- CL1000N Standard Rack Mountingp. 21
A standard rack mount kit is provided with your CL1000N. The kit enables the console to be mounted in rack with a depth of 52–85 cm. Note: 1. It takes two…
- CL1000M / CL1000N Installationp. 23
Refer to the installation diagram as you perform the installation steps. The numbers in the diagrams correspond to the numbers of the steps. 1. Plug the SPHD…
- Operationp. 25
CL1000M Opening the Console The CL1000M's console is located under the top cover. To access the console, slide the console module out and raise the cover.…
- CL1000M Opening the Consolep. 25
The CL1000M's console is located under the top cover. To access the console, slide the console module out and raise the cover. Note: As a safety precaution, to…
- CL1000N Opening the Consolep. 27
The CL1000N's console is located under the top cover. To access the console, slide the console module out and raise the cover. Note: As a safety precaution, to…
- Operating Precautionsp. 29
Right! Rest your hands and arms lightly on the keyboard module as you work. Wrong! DO NOT lean your body weight on the keyboard module. DO NOT place heavy…
- LCD OSD Configurationp. 30
LCD Buttons The LCD OSD allows you to set up and configure the LCD display. Four buttons are used to perform the configuration, as described in the table…
- Port ID Numbering & Port Selectionp. 32
Port ID numbering and Port Selection follow the method used by the KVM switch connected to the CL1000M / CL1000N. Consult your KVM switch's User Manual for…
- Appendixp. 33
Safety Instructions General This product is for indoor use only. Read all of these instructions. Save them for future reference. Follow all warnings and…
- Safety Instructionsp. 33
General This product is for indoor use only. Read all of these instructions. Save them for future reference. Follow all warnings and instructions marked…
- Consignes de sécuritép. 36
Général Ce produit est destiné exclusivement à une utilisation à l’intérieur. Veuillez lire la totalité de ces instructions. Conservez-les afin de pouvoir…
- Technical Supportp. 40
International For online technical support – including troubleshooting, documentation, and software updates: http://eservice.aten.com For telephone…
- Specificationsp. 41
Function CL1000M CL1000N Connector KVM Ports 1 x SPHD-15 Female (Yellow) 1 x SPHD-15 Female (Yellow) Power 1 x 3-prong AC Socket 1 x 3-prong AC Socket Switches…
- CL1000M Optional Rack Mountingp. 43
For convenience and flexibility, three optional rack mounting kits are available for the CL1000M, as shown in the following table: To install the long bracket…
- CL1000N Optional Rack Mountingp. 47
- About SPHD Connectorsp. 50
This product uses SPHD connectors for its KVM and/or Console ports. We have specifically modified the shape of these connectors so that only KVM cables that we…
- Limited Hardware Warrantyp. 51
ATEN warrants its hardware in the country of purchase against flaws in materials and workmanship for a Warranty Period of two [2] years (warranty period may…