Loading manual…
StarTech.com Wall Mount Workstation (WALLSTSI1) user manual
- Type
- User manual
- Language
- English
- Pages
- 30
- Category
- Monitors
- Models
- WALLSTSI1
Open PDFOpens the file on objects.icecat.biz.
Contents
- Compliance Statementsp. 2
Use of Trademarks, Registered Trademarks, and other Protected Names and Symbols This manual may make reference to trademarks, registered trademarks, and other…
- Warning Statementsp. 3
Make sure that you assemble this product according to the instructions. • Do not exceed the weight capacity of this product. Overloading this product might…
- Safety Statementsp. 5
Safety Measures • Cables (including power and charging cables) should be placed and routed to avoid creating electric, tripping or safety hazards. Mesures de…
- Product Diagramp. 7
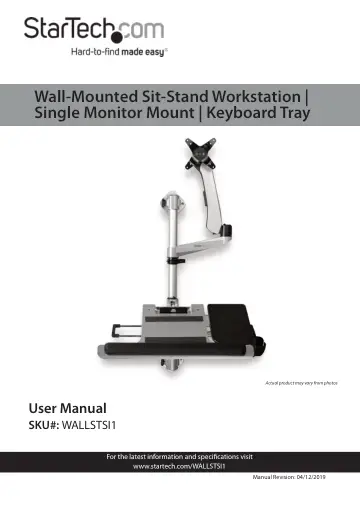
Monitor Mount 6 Swivel Arm 2 Spring Arm 7 Keyboard Tray 3 Wall-Mount Bracket 8 Mouse Pad 4 Aluminum Pole 9 Mouse Holder 5 Cable-Management Clip 1 2 3 4 5 7 6 8…
- Product Dimensionsp. 8
- Product Rotationp. 9
- Product Informationp. 10
Specifications Type of measurement Measurement VESA mounting hole pattern 75x75 100x100 Tilt +900 to -150 Screen size Maximum 762 mm (30 in.) Rotate 3600
- Specificationsp. 10
Type of measurement Measurement VESA mounting hole pattern 75x75 100x100 Tilt +900 to -150 Screen size Maximum 762 mm (30 in.) Rotate 3600
- Requirementsp. 12
Phillips Head Screwdriver x 1 • Drill with Drill Bit x 1 • Writing Utensil x 1 • Level x 1
- Installationp. 13
Mounting the Sit-Stand Workstation Notes: Make sure when mounting the Sit-Stand Worksta tion that you mount the bottom Wall-Mount Bracket w/ Lock Plate first…
- Mounting the Sit-Stand Workstationp. 13
Notes: Make sure when mounting the Sit-Stand Worksta tion that you mount the bottom Wall-Mount Bracket w/ Lock Plate first and slide the Aluminum Pole into…
- Attaching the Mouse Padp. 18
1. Determine which side of the Keyboard Tray you want to position the Mouse Tray. 2. Align the Mouse Tray with the two metal prongs on either side of the…
- Attaching the Wrist Restp. 19
Remove the backing from the Wrist Rest and while applying pressure, attach it to the bottom of the Keyboard Tray (in the location your wrists would normally…
- Attaching the Rubber Stripsp. 19
1. Remove the backing from both of the Rubber Strips. 2. While applying pressure, fix them to the top and bottom of the Keyboard Tray, in the location the…
- Attaching the Hook-and-Loop Stripp. 20
The Hook-and-Loop Strip is designed to help hold the Keyboard in place on the Keyboard Tray. 1. If necessary, cut the Hook-and-Loop Strip to fit the length of…
- Attaching the Keyboard Trayp. 20
1. Align the Mounting Hole on the third Swivel Arm with the Mounting Peg on the bottom Swivel Arm.
- Attaching a Monitorp. 23
1. Align the Mounting Holes (x 4) on the Monitor Mount with the mounting holes on the back of the Monitor. 2. Insert the Hand Screws through the Monitor Mount…
- Attaching the Monitor Mountp. 23
Notes: Attaching the Monitor Mount may require two people. The Monitor Mount supports up to a maximum of 9 kg. 1. Align the Mounting Hole on the Spring Arm…
- Adjusting the Monitor Tiltp. 26
While supporting the weight of the Monitor, use the Hex Key (included) to loosen or tighten the Hex Screw on the side of the Monitor Mount, until the tension…
- Adjusting the Spring Arm Tensionp. 26
Using the large Hex Key, adjust the tension of the Spring Arm by loosening or tightening the recessed Hex Screw located at the top of the Spring Arm next to…
- Adjusting the Keyboard Tiltp. 27
To view manuals, videos, drivers, downloads, technical drawings, and more visit www.startech.com/support • Adjust the tension of the Spring Arm until the…