Loading manual…
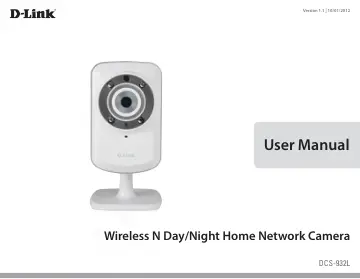
D-Link DCS-932L (DCS-932L/E) user manual
- Type
- User manual
- Language
- English
- Pages
- 62
- Models
- DCS-932L/E
Open PDFOpens the file on objects.icecat.biz.
Contents
- Product Overviewp. 5
DCS-932L Wireless N Day/Night Home Network Camera • CAT5 Ethernet Cable • Power Adapter • Manual and Software on CD • Quick Install Guide • Mounting Kit Note…
- System Requirementsp. 5
Computer with Microsoft Windows® 8/7/Vista/XP, or Mac with OS X 10.6 or higher • PC with 1.3GHz or above and at least 128MB RAM • Internet Explorer 7, Firefox…
- Introductionp. 6
Congratulations on your purchase of the DCS-932L Wireless N Day/Night Home Network Camera. The DCS-932L is a versatile and unique solution for your small oice…
- Hardware Overviewp. 8
Front View Power and Link LED Camera Lens Microphone IR LED Light Sensor
- Front Viewp. 8
Power and Link LED Camera Lens Microphone IR LED Light Sensor
- Rear Viewp. 9
Power Receptor Ethernet Port Reset WPS LED WPS Button Camera Stand
- Installationp. 10
Hardware Installation Connect the Ethernet Cable Connect the included Ethernet cable to the network cable connector located on the back panel of the DCS-932L…
- Hardware Installationp. 10
Connect the Ethernet Cable Connect the included Ethernet cable to the network cable connector located on the back panel of the DCS-932L and attach it to the…
- Wireless Installation Considerationsp. 11
The D-Link Wireless Network Camera lets you access your network using a wireless connection from anywhere within the operating range of your wireless network.…
- Camera Installation Wizardp. 12
Windows Users Note: If the autorun program does not open, go to My Computer, browse to your CD drive, and double-click on the setup.exe ile. Insert the…
- Windows Usersp. 12
Note: If the autorun program does not open, go to My Computer, browse to your CD drive, and double-click on the setup.exe ile. Insert the Installation CD-ROM…
- Mac Usersp. 13
Insert the Installation CD-ROM into your computer’s optical drive. On the desktop, open your CD drive and double-click on the SetupWizard ile. After about…
- WPS - Push Button Setupp. 14
WPS Button Alternatively, you may create a secure wireless connection using the WPS Button on the back of the camera.
- mydlink Portalp. 15
After registering your DCS-932L camera with a mydlink account in the Camera Installation Wizard. You will be able to remotely access your camera from the…
- Camera Statusp. 16
If your camera is oline, try the following: • Check to make sure that the Internet connection to your camera is working properly. • Try restarting your…
- Live Videop. 17
In the main part of the screen, the Live Video tab will be selected by default. If the camera is available, a Live Video feed will be displayed. Video will be…
- Camera Settingsp. 18
The Camera Settings tab allows you to access your camera’s coniguration interface. To open your camera’s coniguration interface, click Camera web page and…
- Camera Infop. 19
The Camera Info tab shows you various information about your camera.
- WEB Conigurationp. 20
Using the WEB Coniguration Menu After completing the Camera Installation Wizard, you are ready to use your camera. The camera’s built-in Web coniguration…
- Using the WEB Coniguration Menup. 20
After completing the Camera Installation Wizard, you are ready to use your camera. The camera’s built-in Web coniguration utility is designed to allow you to…
- Live Videop. 22
ActiveX: Java: For Windows® Users that do not have Java installed, please choose this option to view video streaming on the Live Video page. Select Java when…
- Setupp. 22
You may choose to conigure your network by using the Internet Connection Setup
- Wizardp. 22
that includes step-by-step instructions. Otherwise, you may manually conigure your connection using the Manual Internet Connection Setup. Note: This will not…
- Internet Connection Setup Wizardp. 23
This wizard will guide you through a step-by-step process to conigure your new D-Link Camera and connect the camera to the Internet. Click Next to continue. •…
- Network Setupp. 25
Select this connection if you have a DHCP server running on your network and would like a dynamic IP address to be updated to your camera automatically. You…
- Wirelessp. 26
Service Set Identiier, an identiier for your wireless network. The default setting is channel 6. Select the same channel that is being used by other wireless…
- DDNSp. 27
service. Click to enable the DDNS function. Select your Dynamic DNS Server from the pull down menu. Enter the host name of the DDNS server. Enter your username…
- Image Setupp. 28
Select this box to enable antilicker. Select this box to vertically lip the video. If the camera is installed upside down, Flip Image and Mirror should both be…
- Videop. 29
Proile: Encode Type: Resolution: FPS: JPEG Quality: View Mode: Light Frequency
- Video Conigurationp. 29
This section allows you to conigure the video settings for your camera. This section allows you to change the Encode Type, Resolution, FPS, and Quality. The…