Loading manual…
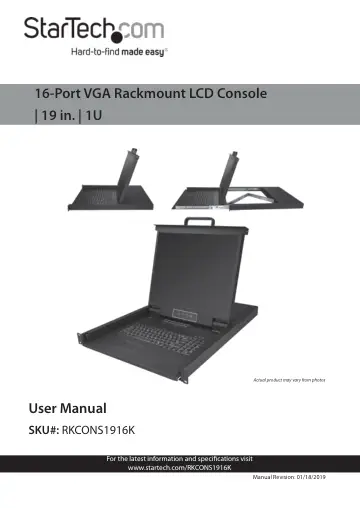
StarTech.com 16 Port Rackmount KVM Console w/ 6ft Cables (RKCONS1916K) user manual
- Type
- User manual
- Language
- English
- Pages
- 44
- Category
- Monitors
- Models
- RKCONS1916K
Open PDFOpens the file on objects.icecat.biz.
Contents
- Compliance Statementsp. 2
FCC Compliance Statement This equipment has been tested and found to comply with the limits for a Class B digital device, pursuant to part 15 of the FCC Rules.…
- Safety Statementsp. 4
Safety Measures • Wiring terminations should not be made with the product and/or electric lines under power. • Product installation and/or mounting should be…
- Warning Statementsp. 5
Make sure to assemble this product according to the instructions. Failure to do so might result in personal injury or property damage. • Never use this product…
- Product Diagram (RKCONS1908K)p. 9
To view manuals, videos, drivers, downloads, technical drawings, and more visit www.startech.com/support Product Diagram (RKCONS1916K)
- Frontp. 9
Mounting Bracket x 2 6 Release Switch 2 Current Port 7 Display Menu Buttons 3 Port Select Buttons/LEDs 8 Keyboard LEDs 4 Display 9 Rails x 2 5 Handle 10 Touch…
- Rearp. 10
Power Switch 2 PS2 Mouse and Keyboard Ports 3 Daisy Chain Port 4 Power Connection Port 5 Ground Connection Screw 6 USB Mouse and Keyboard Ports 7 Console…
- Product Informationp. 11
Packaging Contents • 1U LCD Rack Console Drawer x 1 • Host Cable Kit x 16 • Mounting Rails - Set x 2 • Power Cords (NA, JP, UK, EU, ANZ) x 5 • M5 Cage Nuts x 8…
- Hardware Kit Contentsp. 11
- Requirementsp. 11
are subject to change. For the latest requirements, please visit www.startech.com/RKCONS1916K. • 1U of Rack Space • Grounding Wire • Power Source • Computer…
- Installationp. 12
Mounting the Rack Console Drawer Note: It’s easier to install the Rack Console Drawer if an other person helps you with the installation. Warning: Use caution…
- Mounting the Rack Console Drawerp. 12
Note: It’s easier to install the Rack Console Drawer if an other person helps you with the installation. Warning: Use caution and proper lifting techniques…
- Grounding the LCD Consolep. 13
Note: Grounding is recommended in environments with high levels of electromagnetic interference (EMI), or frequent electrical surges. 1. Using a Phillips Head…
- Connecting the LCD Consolep. 13
To connect the LCD Console to a Computer or KVM, perform the following steps: 1. Turn off the Computer or KVM Switch. 2. Connect the 15-pin Host/KVM Connector…
- Opening the LCD Consolep. 14
1. Move the Release Switch to the unlocked position. Unlocking the LCD Console 2. Use the Handle to pull the LCD Console out of the Rack until you hear the LCD…
- Closing the LCD Consolep. 14
1. Lower the Display until it’s flush against the Keyboard. 2. Slide and hold the two Switches located on the sides of the LCD Console forward and push the LCD…
- Panel Controls and On-Screen Display (OSD) Functionsp. 15
Console Panel Menu The Console Panel buttons are for display adjustments and OSD navigation: Button Function Auto/Exit Auto-synchronizes and scales down the…
- Console Panel Menup. 15
The Console Panel buttons are for display adjustments and OSD navigation: Button Function Auto/Exit Auto-synchronizes and scales down the display to any valid…
- OSDp. 16
Accessing the OSD There are two ways to access the On Screen Display (OSD): • Using a Mouse double click the Right Mouse button. • Using a Keyboard press the…
- Accessing the OSDp. 16
There are two ways to access the On Screen Display (OSD): • Using a Mouse double click the Right Mouse button. • Using a Keyboard press the Scroll Lock button…
- Operations/Menu Titlesp. 16
The following Titles will appear on the operations menus within the OSD: Titles Description SN The level number or port number. $ The corresponding computers…
- Navigationp. 17
Button Description Left and Right Arrows Used to move left and right on the screen accessing menu options. Up and Down Arrows Used to move up and down on the…
- Administrator (ADM) Menup. 18
Accessing the Administrator Menu • On the OSD screen, press the F1 button, the ADM dropdown menu will appear. Administrator screen
- Accessing the Administrator Menup. 18
On the OSD screen, press the F1 button, the ADM dropdown menu will appear. Administrator screen
- Setting up a User Accountp. 19
The Set User Login option, allows you to setup user accounts. 1. On the OSD screen, press the F1 button. 2. Select Set User Login from the Administrator…
- Setting up User Accessp. 21
The Set Accessible option, allows you to setup a user’s system access either Full, View, or Null. 1. On the OSD screen, press the F1 button. 2. Select Set…
- Turning On/Off Broadcast (BRC) Modep. 22
1. On the OSD screen, press the F1 button. 2. Select BRC Mode from the Administrator drop-down menu and press Enter and On icon will appear next to BRC Mode.…
- Scanning All Portsp. 23
1. On the OSD screen, press the F2 button. 2. Select All from the Scan drop-down menu and press Enter to scan all the port. Scan menu
- Scanning All Ports That Are Powered Onp. 24
1. On the OSD screen, press the F2 button. 2. Select Power On from the Scan drop-down menu and press Enter to scan all the port. Scan menu
- Scanning All Quick View Portsp. 25
1. On the OSD screen, press the F2 button. 2. Select Quick View from the Scan drop-down menu and press Enter to scan all the port. Scan menu
- Performing an Auto Scanp. 25
1. On the OSD screen, press the F3 button.