Loading manual…
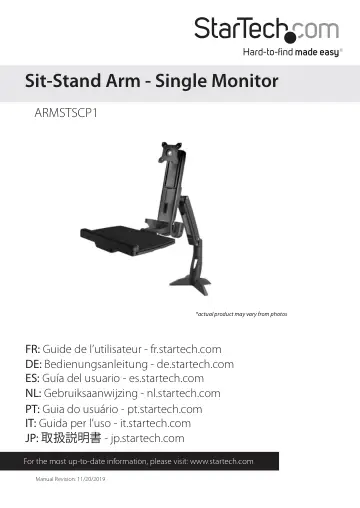
StarTech.com Sit Stand Monitor Arm (ARMSTSCP1) user manual
- Type
- User manual
- Languages
- English, German, Spanish, Dutch
- Pages
- 56
- Category
- Monitors
- Models
- ARMSTSCP1
Open PDFOpens the file on objects.icecat.biz.
Contents
- Warnhinweisep. 3
Beachten Sie bei der Montage dieses Produkts die Montageanweisungen. Bevor Sie dieses Produkt montieren und verwenden, lesen Sie das gesamte Handbuch und…
- Product dimensionsp. 7
32.5 mm (1.3 in.) 124 mm (4.9 in.) 88 mm (3.5 in.) 98 mm (3.9 in.) 105.5 mm (4.1 in.)
- Product diagramp. 10
Grommet feature pictured Keyboard tray
- Technical specificationsp. 11
Type of measurement Measurement VESA 75 x 75 mm 100 x 100 mm Tilt (monitor) -5° to +35° Tilt (keyboard) 0° to +90° Pivot (monitor) 360° Swivel (monitor arm)…
- Requirementsp. 17
Monitor that is compatible with one of the VESA mounting hole patterns that ARMSTSCP1 supports • Phillips type screwdriver • ¹/₄ inch drive ratchet…
- Assemblyp. 18
About the attachment options The ARMSTSCP1 features a grommet assembly and a desk clamp option for attaching the ARMSTSCP1 to a desk or table. Requirements to…
- About the attachment optionsp. 18
The ARMSTSCP1 features a grommet assembly and a desk clamp option for attaching the ARMSTSCP1 to a desk or table. Requirements to use the grommet assembly to…
- Assemble the base attachmentp. 19
Based on your setup, follow the steps to attach the grommet assembly or the desk clamp. Attach the grommet assembly 1. Line up the base plate with the assembly…
- Attach the monitor arm to the basep. 33
1. Place the monitor arm onto the projection on the base. 2. Place the plastic washer into the joint in the monitor arm. 3. Place the metal washer onto the…
- Attach the column to the keyboard trayp. 34
1. Position the column with the cutout at the bottom half of the column. 2. Line up the assembly holes on the bottom of the column with the assembly holes…
- Attach the column to the monitor armp. 37
1. Insert one of the M6x10 mm screws into the top hole in the plate on the back of the column. (figure 19) Note: Do not tighten the M6x10 mm screw and make…
- Attach the VESA monitor mount to a monitorp. 40
1. If you want to be able to rotate your monitor 360°, use a Phillips type screwdriver to remove the screw from the VESA monitor mount. (figure 22) figure 22…
- Attach the monitor to the columnp. 42
1. Carefully hook the back of the VESA monitor mount onto the plate on the column. (figure 24) figure 24 VESA monitor mount Column
- Attach the adhesive stripp. 44
1. If necessary, cut the adhesive strip to fit the length of your keyboard. 2. Separate the two sides of the adhesive strip. 3. Remove the backing from one…
- Route cablesp. 45
1. Run your cable along the column and through the slot at the bottom of the column. 2. At the top of the cable cover, squeeze the tabs and gently pull the…
- Remove the monitorp. 46
Warning: Stored energy hazard! The column contains a lift mechanism that could move up quickly when you remove the monitor from the product. Before you remove…
- Adjusting the ARMSTSCP1p. 47
Adjust the tilt angle of the monitor • To increase or decrease the tilt, use the 2.5 mm hex key and adjust the screw in the top of the VESA monitor mount.…
- Adjust the tilt angle of the monitorp. 47
To increase or decrease the tilt, use the 2.5 mm hex key and adjust the screw in the top of the VESA monitor mount. (figure 29) 2.5 mm hex key VESA monitor…
- Adjust the tilt angle of the keyboard trayp. 48
Pull up or push down on the keyboard tray to adjust it from 0 to 90°. (figure 30) figure 30 Keyboard tray
- Counterbalance the weight of the monitorp. 49
The ARMSTSCP1 features a one-touch height adjustment design that enables you to easily raise or lower your monitor. To use the one-touch height adjustment…
- Counterbalance the weight of the workstationp. 50
- Adjust the swivel effort of the monitor armp. 51
To increase or decrease the swivel effort of the monitor arm, use the 6 mm hex key to turn the screw in the plate on the back of the column to the right or…
- Extend the keyboard trayp. 52
You can adjust the keyboard tray so that it extends to the left or right. • Pull the extension to the left or right. (figure 34)
- Clean the keyboard trayp. 53
You can remove the extension and the plastic cover from the wrist rest to clean them. 1. To remove the plastic cover from the wrist rest, carefully peel it off…
- Technical supportp. 54
StarTech.com’s lifetime technical support is an integral part of our commitment to provide industry-leading solutions. If you ever need help with your product…
- Warranty informationp. 54
This product is backed by a two-year warranty. StarTech.com warrants its products against defects in materials and workmanship for the periods noted, following…