Loading manual…
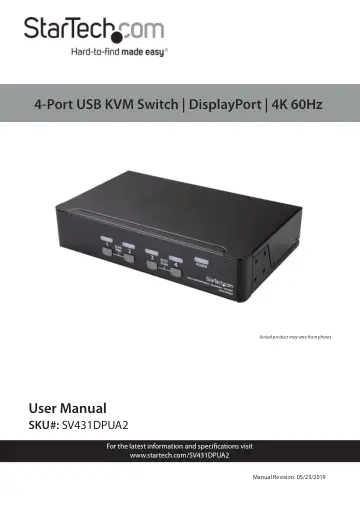
StarTech.com SV431DPUA2 user manual
- Type
- User manual
- Language
- English
- Pages
- 21
- Category
- Monitors
- Models
- SV431DPUA2
Open PDFOpens the file on objects.icecat.biz.
Contents
- Compliance Statementsp. 2
FCC Compliance Statement This equipment has been tested and found to comply with the limits for a Class B digital device, pursuant to part 15 of the FCC Rules.…
- Safety Statementsp. 3
Safety Measures • Wiring terminations should not be made with the product and/or electric lines under power. • Cables (including power and charging cables)…
- Product Diagramp. 6
Front View 1 Port Selection/Link LEDs 2 Power LED 3 Port Select Buttons 2 3 1
- Front Viewp. 6
Port Selection/Link LEDs 2 Power LED 3 Port Select Buttons 2 3 1
- Rear Viewp. 7
Console DisplayPort Port 6 PC 4 Ports 2 Power Adapter Port 7 PC 3 Ports 3 Console Speaker and Mic Ports 8 PC 2 Ports 4 USB Keyboard and Mouse Ports 9 PC 1…
- Product Informationp. 8
Package contents • KVM Switch x 1 • Foot Pads x 4 • Universal Power Adapter (NA/JP, EU, UK, ANZ) x 1 • Quick-Start Guide x 1
- Requirementsp. 8
are subject to change. For the latest requirements, please visit www.StarTech.com/SV431DPUA2. Cables • USB-A to USB-cable or USB-C to USB-B cable’ • 3.5 mm…
- Installationp. 9
Setting Up a PC The following setup changes are required for PC users and aren’t necessary if you’re using a mac. 1. In Standard CMOS, set Halt on Error to All…
- Setting Up a PCp. 9
The following setup changes are required for PC users and aren’t necessary if you’re using a mac. 1. In Standard CMOS, set Halt on Error to All But Keyboard.…
- Connecting a Console to the KVM Switchp. 9
1. Turn off your computer and any devices or peripherals that are connected to it (for example, printers, external hard drives, and so on). 2. Connect a…
- Connecting a Computer to the KVM Switchp. 10
You can connect up to four computers to the KVM switch. 1. Turn off the computers that you want to connect to the KVM switch and any devices or peripherals…
- Operationp. 11
Selecting a Computer Port Selection Buttons • Push the port selection button for the connected computer that you want to select. The port selection/link LED…
- Selecting a Computerp. 11
Port Selection Buttons • Push the port selection button for the connected computer that you want to select. The port selection/link LED illuminates red to…
- Starting an Auto Scanp. 11
The KVM switch includes an Auto Scan feature that you can use to scan through the connected computers in sequence with a fixed scan time. If any keyboard or…
- Setting Scan Time Durationp. 12
You can set the duration of the scan time to 3, 8, 15, or 30 seconds. Port Selection Button • Press port selection buttons 1 and 2 simultaneously. The KVM…
- Using hotkey Commandsp. 13
” section of the manual. Using hotkey Commands If you’re using a computer that’s running a version of Windows or Linux, you can use hotkey commands to operate…
- Disabling hotkey Commandsp. 13
By default, hotkey commands are enabled on the KVM switch. • Press and hold the Left Shift key and press Num Lock twice. Release the Left Shift key and then…
- Selecting a Computerp. 14
Press the Left Ctrl key twice and the number of the PC port that you want to select. For example, if you want to select computer 2, you would press Left Ctrl…
- Starting an Auto Scanp. 14
Press Left Ctrl, Left Ctrl, F1. The port selection/link LEDs blink during the Auto Scan process. Note: To exit the Auto Scan, press Left Ctrl, Left Ctrl
- Setting Scan Time Durationp. 14
- Scanning Computers Manuallyp. 14
The KVM switch includes a manual scan feature that you can use to switch between connected computers that are turned on. 1. Press Left Ctrl, Left Ctrl, F2.
- Disabling the Audio Stick Featurep. 15
By default, the Audio Stick feature is enabled on the KVM switch, which means that the audio selection is determined by the computer that is currently…
- Using an Alternative hotkey Commandp. 16
In addition to the Left Ctrl hotkey commands, there are two alternative commands that you can use to select a computer: • Press Scroll Lock, Scroll Lock, <the…
- About the LED indicatorsp. 16
The KVM switch comes with a port selection/link LED for each port, as well as a power LED. For more information about the LEDs, consult the table below. LED…
- Troubleshootingp. 17
I can’t get my wireless mouse and keyboard to work Some wireless mice and keyboards do work with KVM switches, but in general, most wireless mice and keyboards…