Loading manual…
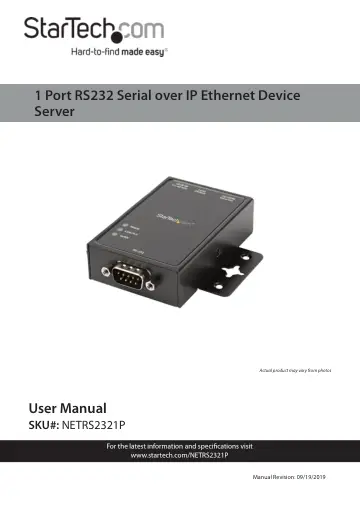
StarTech.com NETRS2321P user manual
- Type
- User manual
- Language
- English
- Pages
- 34
- Category
- Desktops & servers
- Models
- NETRS2321P
Open PDFOpens the file on objects.icecat.biz.
Contents
- Compliance Statementsp. 2
FCC Compliance Statement This equipment has been tested and found to comply with the limits for a Class A digital device, pursuant to Part 15 of the FCC rules.…
- Safety Statementsp. 3
Safety Measures • Wiring terminations should not be made with the product and/or electric lines under power. • Cables (including power and charging cables)…
- Product Diagramp. 6
Top View 1 LEDs 2 RS-232 DB9 Serial Port 3 Wall Mount Screw Hole 4 DIN Rail Screw Hole 2 4 3 1
- Top Viewp. 6
LEDs 2 RS-232 DB9 Serial Port 3 Wall Mount Screw Hole 4 DIN Rail Screw Hole 2 4 3 1
- Rear Viewp. 7
- RJ45 Pin Assignmentp. 8
- RS-232 DB9 Pin Assignmentp. 9
- Product Informationp. 10
Package Contents • Serial over IP Device Server x 1 • Universal Power Adapter (NA/UK/EU/AU) x 1 • User Manual x 1 • DIN Rail Kit x 1
- Installationp. 10
1. Plug in the power adapter and connect the RJ45 interface to your LAN. NOTE: Alternatively, you can also use a crossover cable to connect the NETRS2321P…
- DIN Rail Mountingp. 11
Attach the included DIN Rail brackets (one per side) using the provided screws to the top DIN Rail screw hole (marked in the above diagram), and clip to your…
- Load Default Settings/System Reset Buttonp. 11
Load Default Settings • Press and hold this button for more than 3 seconds, then release to load the factory default settings. IP address: 10.1.1.1 Subnet…
- Load Default Settingsp. 11
- System Resetp. 11
Button Load Default Settings • Press and hold this button for more than 3 seconds, then release to load the factory default settings. IP address: 10.1.1.1…
- Broadcast Searchp. 11
The Broadcast Search function is used to locate all NETRS2321P devices that are connected to the same LAN as your computer. Since the Broadcast Search function…
- Using the Web Consolep. 12
Accessing the Web Console 1. Navigate to an web page and enter the IP Address on the NETRS2321P device in the Address Bar and press Enter (default IP Address =…
- Accessing the Web Consolep. 12
1. Navigate to an web page and enter the IP Address on the NETRS2321P device in the Address Bar and press Enter (default IP Address = 10.1.1.1). 2. The Login…
- Changing/Setting a Login ID and Passwordp. 12
1. From the Home screen, click the Administrator link on the left-hand side of the screen. 2. From the drop down menu select the Authentication link. 3. The…
- Configuring System Network Settingsp. 13
- System Statusp. 15
- Load Default Settingp. 15
- Firmware Updatep. 16
On this page, you can update the firmware via Ethernet. Note: Pressing the ‘Load’ button will immediately erase the flash with no further warning 1. From the…
- Configuring TCP Modep. 17
Note: When TCP mode is set to Server or Client mode, the UDP mode will be disabled automatically. When UDP mode is enabled, the TCP mode will be disabled…
- Configuring UDP Modep. 19
1. From the Home screen, click the UDP Mode link on the lefthand side of the screen. 2. The UDP Mode screen will appear.
- UARTp. 21
or Universal Asynchronous Receiver Transmitter refers to the RS-232 serial port of the device. All of the port settings can be modified from the UDP screen. 1.…
- Resetting the Devicep. 24
1. From the Home screen, click the Restart link on the left-hand side of the screen. 2. The UART Mode screen will appear. 3. Press the Reset button to rest the…
- Virtual COM Software Operationp. 24
The Virtual Com application lets you install and configure your NETRS2321P easily over the network. Five function groups are provided to ease the installation…
- Installing the Virtual COM Softwarep. 24
1. Using a web browser, navigate to www.startech.com/ NETRS2321P. 2. On the Product page, click the Support tab located in the middle of the screen. 3. In the…
- Configuration the Virtual COM Softwarep. 26
1. From the Main screen, select the device you would like to adjust and click the Configure button. Main Screen 2. An Authorization screen will appear, you…
- Setting Up COM Mappingp. 28
1. From the Main screen, select the Com Mapping link from the left-side of the screen. Main Screen 2. The COM Mapping screen will appear. COM Mapping Screen
- TCP/UDP Settingsp. 30
Depending on the protocol you are using, the options below will enable/disable automatically as applicable. Server/Client (TCP Mode Only) • Set the device to…