Loading manual…
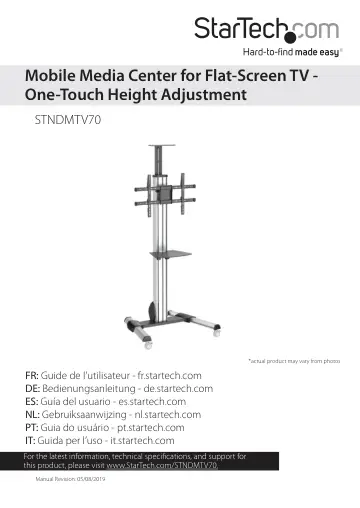
StarTech.com TV Cart - Height Adjustable - Lockable Wheels (STNDMTV70) user manual
- Type
- User manual
- Languages
- English, German, Dutch
- Pages
- 51
- Category
- TVs
- Models
- STNDMTV70
Open PDFOpens the file on objects.icecat.biz.
Contents
- Warnhinweisep. 4
Beachten Sie bei der Montage dieses Produkts die Montageanweisungen. Bevor Sie dieses Produkt montieren und verwenden, lesen Sie das gesamte Handbuch und…
- Introductionp. 7
Product dimensions min 200 mm to max 600 mm 723 mm 230 mm 150 mm 285 mm max 2140 mm min 1110 mm to max 1510 mm 828 mm 700 mm 430 mm 335 mm 290 mm 145 mm min…
- Product dimensionsp. 7
min 200 mm to max 600 mm 723 mm 230 mm 150 mm 285 mm max 2140 mm min 1110 mm to max 1510 mm 828 mm 700 mm 430 mm 335 mm 290 mm 145 mm min 200 mm to max 404 mm…
- Product diagramp. 8
Camera shelf Adapter bracket Crossbar Support plate Column Multimedia shelf Pedal lock Right leg Left leg Plastic cover Base Connecting plate Caster
- Technical specificationsp. 9
Unless otherwise indicated, the technical specifications in the table below apply to the TV. Type of measurement Measurement VESA mounting hole pattern on the…
- Requirementsp. 16
A TV that is compatible with one of the VESA mounting hole patterns STNDMTV70 supports • A Phillips™ type screwdriver Requirements are subject to change. For…
- Asssemblyp. 17
Warning! Assembling this product requires multiple people. DO NOT attempt to assemble this product and install equipment without assistance
- Assemble the basep. 17
1. Insert the base into the left leg, aligning the holes in the base with the holes in the left leg. 2. Insert two M6x16 mm screws through the left leg and…
- Adjust the height of the castersp. 18
You can adjust the height of each of the four casters so that the casters are balanced and the assembly doesn’t rock. 1. Use the caster wrench to loosen the…
- Attach the column to the basep. 19
1. Snap the column cover onto the top of the column. (figure 3) figure 3 Column cover Column 2. Press the pedal locks down on each of the casters to lock them…
- Assemble the TV mountp. 22
1. Slide the crossbars through the top and bottom openings in the support plate. (figure 7) figure 7 2. Position the crossbars so that they are centered on the…
- Attach the support plate to the columnp. 23
1. Lift up the support plate and hook the top of the support plate onto the protrusion and the studs on the column. (figure 10) figure 10 Column Support plate…
- Move the support plate to the lowest positionp. 25
When the spring-loaded pin is positioned in one of the holes in the side of the spool at the bottom of the column, the vertical position of the TV is locked…
- Attach the adapter brackets to a flush mounting surfacep. 27
To accommodate different TV designs, the STNDMTV70 comes with five sets of screws of different lengths and diameters, TV washers with two hole sizes, and two…
- Attach the adapter brackets to a recessed mounting surfacep. 29
- Attach the TV to the columnp. 32
Warning! Attaching the TV requires multiple people. Do not attempt to complete this task by yourself. Warning! Make sure that you move the support plate to the…
- Counterbalance the weight of the TVp. 35
When you add a TV to the STNDMTV70, you need to adjust the lift capacity of the TV cart to support the weight of the TV. If the lift capacity of the STNDMTV70…
- Attach the plastic coverp. 36
Caution! Exercise caution when you assemble the plastic cover because the tabs on the plastic cover can be broken off easily if you use excess force during…
- Attach the cable clipsp. 38
1. Remove the backing from the cable clips. figure 22 Cable clip Column
- Install the multimedia shelfp. 39
1. Place the shelf spacers over the projections on the underside of the multimedia shelf. 2. Position the right and left support brackets over the washers so…
- Attach the camera shelfp. 42
figure 26 1. Line up the holes on the camera shelf with the holes on the end of the connecting plate. 2. Insert the three countersunk screws through the top of…
- Attach the wrenchp. 44
1. Thread the two hook-and-loop ties through the hole in one of the support brackets under the multimedia shelf. 2. Hold the wrench against the support bracket…
- Adjusting the STNDMTV70p. 45
Change the orientation of the TV You can position the TV in either landscape or portrait orientation on the STNDMTV70. 1. To display the TV in portrait…
- Change the orientation of the TVp. 45
You can position the TV in either landscape or portrait orientation on the STNDMTV70. 1. To display the TV in portrait orientation, if present, remove the two…
- Adjust the angle of the TVp. 46
1. Turn the knobs on either side of the support plate counterclockwise to loosen them. 2. Push or pull the top or bottom of the TV to adjust the angle of the…
- Adjust the height of the multimedia shelfp. 47
1. Under the multimedia shelf, turn the knob counterclockwise. 2. Move the multimedia shelf to the desired height, and turn the knob clockwise to tighten it…
- Adjust the height of the camera shelfp. 48
1. Loosen the two M6x25 mm screws attaching the connecting plate to the column. 2. Move the connecting plate to the desired height, and use a Phillips type…
- Lock the vertical position of the TVp. 49
When the TV is at the height that you want it to be at, you should lock the vertical position of the TV to prevent the TV from moving up or down the column.…
- Technical supportp. 50
StarTech.com’s lifetime technical support is an integral part of our commitment to provide industry-leading solutions. If you ever need help with your product…
- Warranty informationp. 50
This product is backed by a five-year warranty. StarTech.com warrants its products against defects in materials and workmanship for the periods noted…