Loading manual…
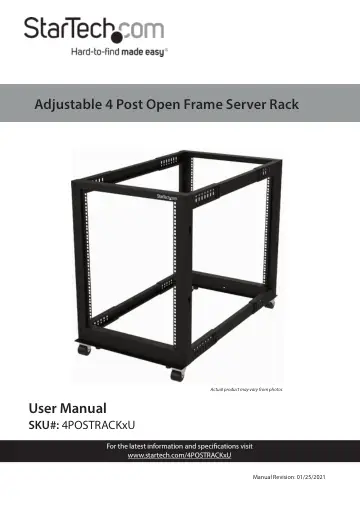
StarTech.com 25U 4-Post Server Rack (4POSTRACK25U) user manual
- Type
- User manual
- Language
- English
- Pages
- 26
- Category
- Desktops & servers
- Models
- 4POSTRACK12U4POSTRACK15U4POSTRACK18U4POSTRACK25U4POSTRACK8U
Open PDFOpens the file on objects.icecat.biz.
Contents
- Product Diagramp. 9
Expanded View 1 Left Vertical Rails (x 2) 5 Center Sections (x 4) 2 Right Vertical Rails (x 2) 6 Top Brackets (x 2) 3 Base Brackets (x 2) 18 Casters (x 4) 4…
- Expanded Viewp. 9
Left Vertical Rails (x 2) 5 Center Sections (x 4) 2 Right Vertical Rails (x 2) 6 Top Brackets (x 2) 3 Base Brackets (x 2) 18 Casters (x 4) 4 Corner Sections (x…
- Requirementsp. 15
- Installationp. 15
Note: Two people are required for the Rack assembly
- Set the Mounting Depthp. 15
1. Align the Corner Sections (x 2) with the Center Sections (x1) and slide the Corner Sections overtop of the Center Sections. (Figure 1) 2. Determine the…
- Assemble the Rackp. 17
1. Place one Left Vertical Rail and Right Vertical Rail on the ground so that they are parallel to one another. Note: The rack height numbers should be facing…
- Install the Leveling Feetp. 21
Note: Flip the Rack onto its side to complete this step. 1. Insert the four Leveling Feet into the four holes located in the bottom of each Base Bracket. 2.…
- Install the Castersp. 21
Notes: Flip the Rack onto its side to complete this step. Two people may be required to complete this step. 1. Align the four holes in a Caster with the four…
- Install the Cable Management Hooksp. 22
1. Align the Cable Management Hooks with the Cable Mounting Screw Holes along the back of the Rack. 2. Insert a Hook Mounting Screw though the Rack and into…
- Ground the Rackp. 23
1. Insert an M6 Screw through the Grounding Point on the Grounding Wire and into the Ground Hole located on the bottom of the Rack. (Figure 10) 2. Run the…
- Operationp. 24
Adjust the Leveling Feet Unscrew the Levelling Feet by hand and with a 14 mm Wrench, until all four Levelling Feet are set to the same height and pressed…
- Adjust the Leveling Feetp. 24
Unscrew the Levelling Feet by hand and with a 14 mm Wrench, until all four Levelling Feet are set to the same height and pressed firmly against the floor.…
- Warranty Informationp. 25
This product is backed by a two-year warranty. For further information on product warranty terms and conditions, please refer to www.startech.com/warranty.…