Loading manual…
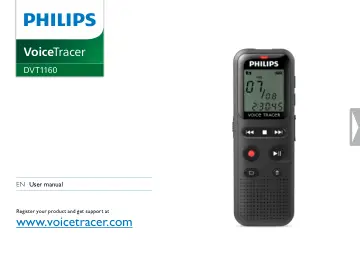
Philips DVT1160 user manual
- Type
- User manual
- Language
- English
- Pages
- 36
- Category
- Microphones
- Models
- DVT1160
Open PDFOpens the file on objects.icecat.biz.
Contents
- 1.1 Safety instructionsp. 5
Protect the device from rain or water to prevent a short circuit. • Do not expose the device to excessive heat caused by placing it on a heating device or in…
- 2 About this user manualp. 7
You can find a quick overview of your device in the following pages. For detailed description, see the following chapters of this user manual. Read this user…
- 2.1 Symbols usedp. 7
Tip • This symbol identifies information that helps you to use your device more efficiently and simply. Note • This symbol indicates notices which you must…
- 3 VoiceTracerp. 8
We are delighted that you have chosen a Philips device. Visit our website for comprehensive support such as user manuals, software downloads, warranty…
- 3.1 Product highlightsp. 8
Voice-activated recording for hands-free dictating • Highlight important parts of your recording using index marks • Super-fast USB transfer of recordings and…
- 3.2 What's in the boxp. 9
a Device b Two AAA batteries c Quick-start guide d USB cable to connect to a computer Note • If any item is missing or damaged, please contact your distributor.
- 3.3 Product overviewp. 10
3.3.1 Front and rear sides a ON/OFF switch / HOLD (keypad lock) b Micro USB port for computer connection c Status LED: Red – device is recording Green – device…
- 3.4 Start-up screenp. 12
a Playback/recording time / Remaining recording time / Menu entry b Indicator for the remaining recording time (in stop mode press stop key j) c…
- 4 First stepsp. 14
Table of contents 4 First steps Use the installation guide on the following pages to start using your device quickly and easily. Caution • Follow the…
- 4.1 Inserting the batteriesp. 14
Your device is supplied with two AAA batteries. 1 Slide the battery compartment cover downwards. 2 Fold the cover out. 3 Insert the batteries or rechargeable…
- 4.2 Power on/offp. 15
Slide the on/off switch on the side of the device downwards for approximately two seconds. X The device turns on and the start-up screen is displayed. 2 To…
- 4.3 Initial installation processp. 15
When using for the first time, you must set the date and time of the device. 4.3.1 Setting date & time Follow the description in the chapter "Setting date &…
- 4.4 Enabling/disabling the keypad lockp. 16
The keypad lock deactivates all keys on the device. The timer function of the device continues to function. 1 Slide the HOLD switch up into the HOLD position…
- 4.5 Accessoriesp. 16
4.5.1 Connecting the headphones Warning • Set the volume to a moderate level and do not use headphones to listen for excessively long periods of time. Exposure…
- 4.6 Connecting to a computerp. 17
You can select one of the following options once you have connected the device to a computer • A USB mass storage device: You can use the File Explorer to…
- 5 Recordp. 19
The device offers many features that you can use during recording or to improve the quality of a recording. Use the timer and the voice activation functions to…
- 5.1 Recording settingsp. 19
Before starting a recording, set the required recording quality and microphone sensitivity. Caution • Do not remove batteries or rechargeable batteries from…
- 5.2 Starting recording automaticallyp. 20
The following methods are available for automatic starting of recording: Voice activation. 5.2.1 Using voice activation When voice-activated recording is…
- 6 Playbackp. 21
6.1 Selecting a recording 1 In stop mode (start-up screen), press a to select the desired folder for the recording. X The following symbols will be displayed…
- 6.1 Selecting a recordingp. 21
In stop mode (start-up screen), press a to select the desired folder for the recording. X The following symbols will be displayed, depending on the selected…
- 6.2 Playing a recording backp. 21
Select the required file as described. 2 Press e to playback the selected file. X The record/play indicator will light green. During playback, the time…
- 6.3 Adjusting playback speedp. 21
Press and hold the playback key e for at least 3 seconds during playback. 2 Press + / – to set the desired playback speed. 3 Press the record key, g, to confirm
- 6.4 Quick searchp. 21
You can scan backward or forward in the current file at a fast speed. This allows to find a specific part of the recording. 1 During playback press and hold…
- 6.5 Repeating playbackp. 22
You can automatically repeat playback of a certain file, folder or sequence (=loop). 1 Select the required file as described. 2 Press e to playback the…
- 6.6 Protecting a recording / lock filep. 23
You can protect recordings against unintentional deletion. 1 Select the required file as described. 2 Press MENU briefly. 3 Using h / b select LOCK. 4 Press…
- 6.7 Unprotect / unlock filep. 23
Select the required file as described. 2 Press MENU briefly. 3 Using h / b select UNLOCK. 4 Press the record key, g, to confirm.
- 7 Deletep. 24
You can delete an individual recording on the device or all the recordings in the folder
- 7.1 Deleting recordings on the devicep. 24
You can delete individual recordings from the device. Connect the device to a computer if you want to delete multiple files. Caution • Only delete the…
- 7.2 Deleting all recordings in the folderp. 24
You can delete all recordings in the selected folder. Connect the device to a computer if you want to rename an entire folder. 1 In stop mode (start screen)…
- 8 Settingsp. 25
Press and hold the MENU key for at least two seconds while the device is stopped (start-up screen) to enter the Settings menu. Note • Press the j key at the…