Loading manual…
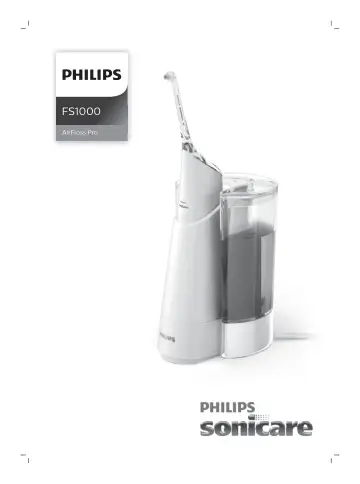
Philips HX8471 user manual
- Type
- User manual
- Language
- English
- Pages
- 24
- Category
- Vacuum cleaners
- Models
- FS1000
Open PDFOpens the file on documents.philips.com.
Contents
- Introductionp. 6
Congratulations on your purchase and welcome to Philips! To fully benefit from the support that Philips offers, register your product at…
- Importantp. 6
Read this user manual carefully before you use the appliance and save it for future reference. Danger - Keep the charger away from water. Do not place or store…
- Dangerp. 6
Keep the charger away from water. Do not place or store it over or near water contained in a bathtub, washbasin, sink etc. Do not immerse the charger in water…
- Warningp. 6
The mains cord cannot be replaced. If the mains cord is damaged, discard the charger. - Always have the charger replaced with one of the original type in order…
- Cautionp. 7
Consult your dentist before you use this appliance if you have had recent oral or gum surgery, suffer from an ongoing dental condition, had extensive dental…
- Electromagnetic fields (EMF)p. 8
This Philips appliance complies with all applicable standards and regulations regarding exposure to electromagnetic fields. Your Philips AirFloss Pro and Fill…
- Your Philips AirFloss Pro and Fill & Charge station (Fig. 1)p. 8
1 Nozzle tip 2 AirFloss Pro nozzle 3 Activation button 4 Reservoir and reservoir door 5 Handle 6 Charge & burst mode indicators - Single burst: 1 LED - Double…
- Chargingp. 9
1 Plug the charger into an electrical outlet. 2 Place the AirFloss handle into the Fill & Charge station cup, with the AirFloss reservoir cover facing toward…
- Getting startedp. 9
Before first use, plug in Fill & Charge station and place handle in handle cup to charge for 24 hours. 1 Remove the reservoir from the Fill & Charge station…
- Using your Fill & Charge stationp. 10
1 Lock the AirFloss handle and handle cup into the Fill & Charge station (click). When you hear a click, the AirFloss is fully engaged and starts to fill…
- Using your AirFloss Prop. 11
1 Make sure the AirFloss is turned on. If it is off, press and release the power/mode button to turn on the product. - You can change the modes to have the…
- Auto-burst functionp. 12
Hold the activation button to deliver bursts continuously, approximately one second between set of bursts. 12 English
- Automatic shut-off functionp. 13
The AirFloss automatically turns off if it has not been used for one minute. Charger insertion and removal instructions Your Fill & Charge station charger can…
- Charger insertion and removal instructionsp. 13
Your Fill & Charge station charger can be removed and used separately as a standalone charger for your AirFloss and many other Philips Sonicare toothbrush…
- To remove the chargerp. 13
1 Remove the reservoir from the Fill & Charge station base. 2 Place the Fill & Charge station base upside down or on its side. 3 Pull the charger cord from the…
- To insert the chargerp. 13
- Fill & Charge station featuresp. 14
1 Auto-fill that begins immediately upon handle engagement 2 Quick-fill that fills your AirFloss handle reservoir completely in just 10 seconds 3 Removable…
- Cleaningp. 15
Fill & Charge station and handle 1 Empty mouthwash from Fill & Charge station reservoir and handle reservoir. 2 Fill the station reservoir with warm water. 3…
- Fill & Charge station and handlep. 15
1 Empty mouthwash from Fill & Charge station reservoir and handle reservoir. 2 Fill the station reservoir with warm water. 3 Place handle in handle cup and…
- Handle and nozzlep. 17
If you want to clean your AirFloss handle between Fill & Charge station cleanings, for example, if your AirFloss becomes clogged, fill the handle reservoir…
- Storagep. 18
If you are not going to use the Fill & Charge station for an extended period of time, unplug it from the electrical outlet, clean it and store it in a cool and…
- Recyclingp. 19
This symbol means that this product shall not be disposed of with normal household waste (2012/19/EU). - This symbol means that this product contains a…
- Removing the rechargeable batteryp. 19
Fill & Charge station Please note that this process is not reversible. To remove the battery, you need a Philips-Head screwdriver and scissors. Observe basic…
- Fill & Charge stationp. 19
Please note that this process is not reversible. To remove the battery, you need a Philips-Head screwdriver and scissors. Observe basic safety precautions when…
- AirFloss handlep. 20
Please note that this process is not reversible. 1 To deplete the battery, repeatedly press the activation button until the AirFloss no longer produces any…
- Guarantee and supportp. 22
If you need information or support, please visit www.philips.com/support or read the separate worldwide guarantee leaflet. Guarantee restrictions The terms of…
- Guarantee restrictionsp. 22
The terms of the international guarantee do not cover the following: - AirFloss Pro nozzle - Damage caused by use of unauthorized replacement parts. - Damage…