Loading manual…
GE JGGN27LPDSB user manual
- Type
- User manual
- Language
- English
- Pages
- 16
- Models
- JGGB27JGGB27LPDSBJGGN27JGGN27LPDSBJGGR27
Open PDFOpens the file on images.salsify.com.
Contents
- Before you will beginp. 1
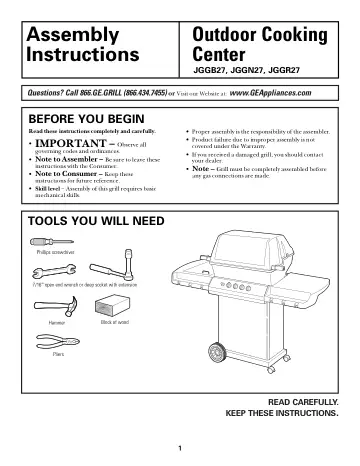
Questions? Call 866.GE.GRILL (866.434.7455) or Visit our Website at: www.GEAppliances.com READ CAREFULLY. KEEP THESE INSTRUCTIONS. Assembly Outdoor Cooking…
- Tools you will needp. 1
Phillips screwdriver 7/16″ open end wrench or deep socket with extension Hammer JGGB27, JGGN27, JGGR27 Pliers Block of wood
- Parts includedp. 2
(Not all models have all parts) Handle and Spacer (2) Lid Hinge Bolt (2) Side Grid (1) Handle Bolt (2) Nut (14) Wheel (2) Clip (2) Shelf Handle (1) Screw (2)…
- 1. Unpack the grillp. 3
• Carefully cut open the box, remove the contents and group like parts together. UNPACK THE GRILL 1 Assembly Instructions 1. Hammer a push nut onto the end of…
- 2. Assemble the base cartp. 3
- 3. Assemble the lower basep. 3
- 4. Mount the base to the grill bottomp. 4
Assembly Instructions 1. Place the grill bottom upside down on the floor and position the hoses as shown. 2. Turn the assembled lower base over and slide it…
- 5. Mount the base cartp. 4
- 6. Set the grill on its wheelsp. 5
Assembly Instructions NOTE: If your model has a burner/shelf, it must be installed on the left side. 1. Peel off the protective shipping film from the side…
- 7. Install the side shelvesp. 5
- 8. Install the left side burner/shelfp. 6
1. Hook the bottom slotted holes of the burner/shelf onto the bottom bolt heads. Raise the shelf and hook it in the up position. 2. Peel off the protective…
- 9. Connect the left side burner/shelfp. 7
1. Connect the side burner hose by pressing the fitting into the side burner gas tube. 2. Pull the side burner hose fitting into the neck of the keyhole…
- 10. Install the lidp. 8
Assembly Instructions 1. Place and align the lid over the grill bottom in the closed position. 2. Insert a lid hinge bolt into each hinge. 3. Open the lid and…
- 11. Install the handlesp. 8
- 12. Assemble the grill compartmentp. 9
1. Place the Flav-R-Wave® on the supports in the bottom of the grill. The Flav-R-Wave® should lie flat. 2. Place the side-by-side grids on the front and back…
- 13. Attach the LP tank retainersp. 10
• Place the end of the LP tank retainer in the hole in the base. Flex the retainer and place the other end in the other hole in the base. Repeat for the other…
- 14. Mount the LP tankp. 10
- 15. Connect the LP tankp. 11
Assembly Instructions 1. Remove the plastic cover from the LP tank connector. 2. Screw the regulator coupling (on the gas hose) onto the LP tank connector in a…
- 16. Test for leaksp. 11
- 17. Insert the drip panp. 11
- Parts listp. 12
- GE parts catalogp. 13
- GE parts catalog (cont.)p. 14