Loading manual…
GE JGGN24LPDBB user manual
- Type
- User manual
- Language
- English
- Pages
- 16
- Models
- JGGN24JGGN24LPDBBJGGR24JGGR24LPDBB
Open PDFOpens the file on images.salsify.com.
Contents
- Befor You Beginp. 1
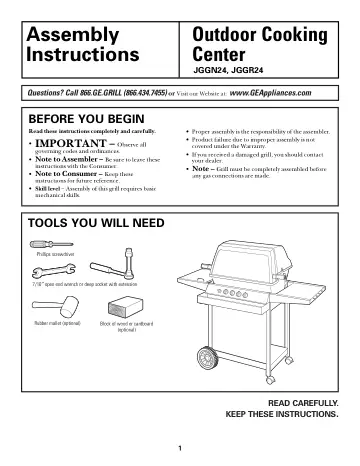
Questions? Call 866.GE.GRILL (866.434.7455) or Visit our Website at: www.GEAppliances.com READ CAREFULLY. KEEP THESE INSTRUCTIONS. Assembly Outdoor Cooking…
- Tools You Will Needp. 1
Phillips screwdriver 7/16″ open end wrench or deep socket with extension Rubber mallet (optional) JGGN24, JGGR24 Block of wood or cardboard (optional)
- Parts Includedp. 2
(Not all models have all parts) Wheel Axle Bolt (2) Thumb Screw (2) Large Bolt (8) Large Wheel Washer (2) Wheel Clip (2) Wheel (2) Wing Nut (19) Handle Bolt…
- Unpack the Grillp. 3
Assembly Instructions 4. Grasp the pan on both sides and raise it up until the legs are standing squarely on the floor. To aid assembly, all parts in bold type…
- Unfold the Base Assemblyp. 3
RIGHT SIDE LEFT SIDE Casters should be on the right top side Pan
- Assemble the Lower Basep. 4
Carriage Bolt RIGHT SIDE LEFT SIDE Assembly Instructions Wheel Axle Bolt (2) Thumb Screw (2) Wing Nut (4) Large Wheel Washer (2) Wheel Clip (2) Wheel Axle Bolt…
- Assemble Base to Grill Bodyp. 5
Wing Nuts Wing Nuts Assembly Instructions 4. Thread a large bolt into the front bottom hole on each side. Secure in place with wing nuts. 5. Position the upper…
- Set the Grill on its Wheelsp. 5
- Install the Handlesp. 6
• Hook the bottom holes of the front bin onto the bottom bolt heads on both sides and lock it down into the neck of the keyhole slot
- Install the Front Binp. 6
Keyhole Slot Handle Nut Spacer Handle Handle Bolt Handle Bolt (2) Handle Nut (2) Large Bolt (1 or 2) Wing Nut (1 or 2) Wing Nut Back Hook on bottom bolt Back…
- Install the Side Shelvesp. 6
Assembly Instructions • Slide a handle bolt through a handle and spacer and into the hole in the grill top. Align and tighten in place with a handle nut using…
- Install the Left Side Burner/shelfp. 7
(on some models) 9 Screw (2) Large Bolt (1) Wing Nut (1) Shelf Handle Screws Side Grid Wing Nut Large Bolt Hook on bottom bolt Back Hook on bottom bolt in slot…
- Connect the Left Side Burner/shelfp. 8
(on some models) 10 Side Burner Gas Tube Side Burner Hose Fitting Make side burner gas connection Pull side burner hose fitting into neck 3. Hand connect the…
- Assemble the Grill Compartmentp. 9
Assembly Instructions 3. With the deflector on top (holes facing front), press the round end of the rotisserie burner (on some models) into the hole on the…
- Install the Front Bannerp. 10
Assembly Instructions 1. Under the left shelf, insert the small bolt from the inside through the square hole in the side support. 2
- Attach the LP Tank Bracketp. 10
to the side support with the small washer and a wing nut. ATTACH THE LP TANK BRACKET 13 • Your grill is designed to be used with an LP gas tank equipped with…
- Mount the LP Tankp. 10
(not included—obtain locally) 14 LP Tank Bracket Wing Nut and Small Washer Small Bolt Wing Nut (1) Small Bolt (1) Small Washer (1) QCC1¤ NEW OPD HANDWHEEL O P…
- Connect the LP Tankp. 11
Regulator (vent holes at 3 o’clock) LP Tank Connector Regulator Coupling Assembly Instructions Read your Owner’s Manual carefully for proper use and care of…
- Test For Leaksp. 11
Prepare a soap solution of one part water, one part liquid detergent. 1. Extinguish any open flame or cigarettes in the area. 2. Make sure the LP tank valve is…
- Hang the Grease Cup Holderp. 11
Grease Cup Holder Can (not included) 1. Remove the plastic cover from the LP tank connector. 2. Screw the regulator coupling (on the gas hose) onto the LP tank…
- Parts Listp. 12
- GE Parts Catalogp. 13
- GE Parts Catalog (2)p. 14