Loading manual…
Whirlpool 14 Cu. Ft. Top Freezer Refrigerator 28 Inch Wide (WRT314TFDW) user manual
- Type
- User manual
- Languages
- English, French
- Pages
- 40
- Category
- Refrigerators & freezers
- Models
- WRT314TFDW
Open PDFOpens the file on content.abt.com.
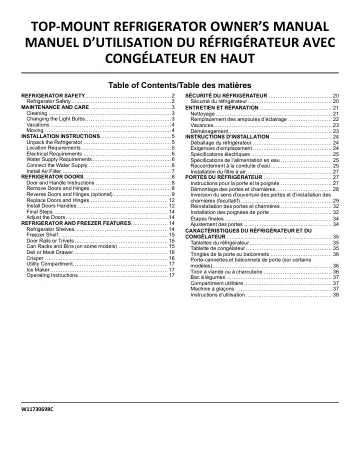
Contents
- REFRIGERATOR SAFETYp. 2
Your safety and the safety of others are very important. We have provided many important safety messages in this manual and on your appliance. Always read and…
- Refrigerator Safetyp. 2
- MAINTENANCE AND CAREp. 3
Cleaning WARNING Explosion Hazard Risk of Fire or Explosion. Flammable Refrigerant Used. Do Not Use Mechanical Devices to Defrost Refrigerator. Do Not Puncture…
- Cleaningp. 3
WARNING Explosion Hazard Risk of Fire or Explosion. Flammable Refrigerant Used. Do Not Use Mechanical Devices to Defrost Refrigerator. Do Not Puncture…
- Changing the Light Bulbsp. 3
IMPORTANT: The lights in both the refrigerator and freezer compartments use LEDs. If the lights do not illuminate when the door or drawer is opened, call for…
- Vacationsp. 4
If You Choose to Leave the Refrigerator On While You’re Away: 1. Use up any perishables and freezer other items. 2. If your refrigerator has an automatic ice…
- Movingp. 4
When you are moving your refrigerator to a new home, follow these steps to prepare it for the move. 1. If your refrigerator has an automatic ice maker: n Turn…
- INSTALLATION INSTRUCTIONSp. 5
Unpack the Refrigerator WARNING Excessive Weight Hazard Use two or more people to move and install or uninstall appliance. Failure to do so can result in back…
- Unpack the Refrigeratorp. 5
WARNING Excessive Weight Hazard Use two or more people to move and install or uninstall appliance. Failure to do so can result in back or other injury. Remove…
- Location Requirementsp. 5
WARNING Explosion Hazard Keep flammable materials and vapors, such as gasoline, away from appliance. Use nonflammable cleaner. Failure to do so can result in…
- Electrical Requirementsp. 6
WARNING Electrical Shock Hazard Plug into a grounded 3 prong outlet. Do not remove ground prong. Do not use an adapter. Do not use an extension cord. Failure…
- Water Supply Requirementsp. 6
Read all directions before you begin. IMPORTANT: n Connect to potable water supply only. Do not use with water that is microbiologically unsafe or of unknown…
- Connect the Water Supplyp. 6
Read all directions before you begin. IMPORTANT: If you turn on the refrigerator before the water line is connected, turn off the ice maker to avoid excessive…
- Install Air Filterp. 7
On some models, your refrigerator’s accessory packet includes an air filter, which must be installed prior to use. On some models, the air filter is already…
- REFRIGERATOR DOORSp. 8
Door and Handle Instructions Depending on the width of your doorway, you may need to remove the doors to move the refrigerator into your home. Also, the door…
- Door and Handle Instructionsp. 8
Depending on the width of your doorway, you may need to remove the doors to move the refrigerator into your home. Also, the door hinges are factory installed…
- Remove Doors and Hingesp. 8
” and “Replace Doors and Hinges” sections. n If you choose to reverse the door swing, a Reversibility Kit, which includes a new brand badge and hole plugs, is…
- Reverse Doors and Hinges (optional)p. 9
IMPORTANT: If you want to reverse your doors so that they open in the opposite direction, follow these steps. If you are not reversing the doors, see “Replace…
- Replace Doors and Hingesp. 12
NOTE: Graphic may be reversed if door swing is reversed. 1. Replace the parts for the bottom hinge as shown. Tighten screws. Replace the refrigerator door.…
- Install Doors Handlesp. 12
Tools Required Parts Supplied: n Door handles (2) n Screws (4 or 6 depending n the model) n Set screws (2) Tools Supplied: n 1/8" Hex key (1) Keep for future…
- Final Stepsp. 14
- Adjust the Doorsp. 14
WARNING Excessive Weight Hazard Use two or more people to lift the appliance door. Failure to do so can result in back or other injury. Your refrigerator has…
- REFRIGERATOR AND FREEZER FEATURESp. 14
Refrigerator Shelves Important information to know about glass shelves and covers: Do not clean glass shelves or covers with warm water when they are cold.…
- Refrigerator Shelvesp. 14
Important information to know about glass shelves and covers: Do not clean glass shelves or covers with warm water when they are cold. Shelves and covers may…
- Freezer Shelfp. 15
- Door Rails or Trivetsp. 15
SNAP ON DOOR RAILS OR TRIVETS To remove and replace the rails or trivets: 1. Depending on your model, remove the rails or trivets by pushing in slightly on the…
- Can Racks and Bins (on some models)p. 15
Can Racks and Door Bins NOTE: Can racks may be purchased as an accessory for some models. To remove and replace the racks/bins: 1. Remove the rack/bin by…
- Deli or Meat Drawerp. 16
- Crisperp. 16
Cover Style 1 – Plastic Cover To remove and replace the crisper cover: 1. Remove the crisper(s). 2. Lift the cover up and slide it out. 3. Replace the cover by…
- Utility Compartmentp. 17
The utility compartment may be removed for easier cleaning. To remove and replace the utility compartment: 1. Remove the utility compartment by squeezing…