Loading manual…
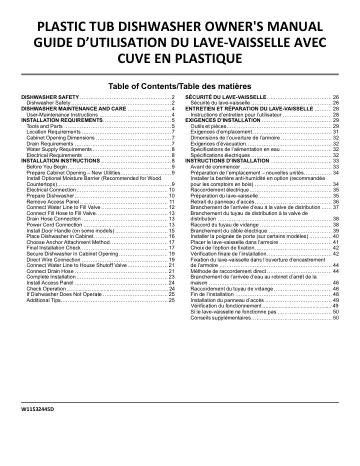
Maytag Dishwasher Hybrid Tub 24 Inch (MDTS4224PZ) installation instructions
- Type
- Installation instructions
- Languages
- English, French
- Pages
- 56
- Category
- Dishwashers
- Models
- MDTS4224PZ
Open PDFOpens the file on content.abt.com.
Contents
- DISHWASHER SAFETYp. 2
Your safety and the safety of others are very important. We have provided many important safety messages in this manual and on your appliance. Always read and…
- Dishwasher Safetyp. 2
- DISHWASHER MAINTENANCE AND CAREp. 4
User-Maintenance Instructions Cleaning the Exterior Clean the exterior of the dishwasher with only a soft, damp cloth and mild detergent. If your dishwasher…
- User-Maintenance Instructionsp. 4
Cleaning the Exterior Clean the exterior of the dishwasher with only a soft, damp cloth and mild detergent. If your dishwasher has a stainless steel exterior…
- INSTALLATION REQUIREMENTSp. 5
Tools and Parts Gather the recommended tools and parts before starting installation. Read and follow the instructions provided with any tools listed here.…
- Tools and Partsp. 5
Gather the recommended tools and parts before starting installation. Read and follow the instructions provided with any tools listed here. Tools Needed: Pliers…
- Location Requirementsp. 1
- Cabinet Opening Dimensionsp. 1
- Drain Requirementsp. 1
- Water Supply Requirementsp. 8
n This dishwasher has a water heating feature and also requires a connection to a hot water supply line. n A hot water line with 20 psi to 120 psi (138 kPa to…
- Electrical Requirementsp. 8
Be sure that the electrical connection and wire size are adequate and in conformance with the National Electrical Code, ANSI/NFPA 70 – latest edition, and all…
- INSTALLATION INSTRUCTIONSp. 8
When you are connecting the air gap, a rubber hose (not provided) will be needed to connect to the waste tee or disposer inlet. n Use 1/2" (12.7 mm) minimum…
- Before You Beginp. 9
WARNING Electrical Shock Hazard Disconnect electrical power at the fuse box or circuit breaker box before installing appliance. Failure to do so can result in…
- Prepare Cabinet Opening – New Utilitiesp. 9
3. Drill hole locations – new construction A B 1/2 1/ A. Optional location B. Preferred location The power-supply receptacle for the appliance shall be…
- Install Optional Moisture Barrier (Recommended for Wood Countertops)p. 9
Moisture barrier/Wood shims A B A. Install wood shims B. Moisture barrier Make sure the area under the cabinet is clean and dry for installation of the…
- Electrical Connectionp. 10
For Direct Wire, begin with step 7 – For Power Cord, wait until step 22 – For Factory Installed Power Cord, begin with Step 29 7. Direct wire – route cable 6”…
- Prepare Dishwasherp. 10
WARNING Tip Over Hazard Do not use dishwasher until completely installed. Do not push down on open door. Doing so can result in serious injury or cuts. WARNING…
- Remove Access Panelp. 11
For Plastic Access Panels, go to step 9 – For Metal Access Panels, go to step 10 9. Plastic panel A B C A. Unlocked B. locked C. 1/4 turn Using a flat-blade…
- Connect Water Line to Fill Valvep. 12
For Copper Line, begin with step 14 – For Flexible Line, begin with step 16 14. Copper water line If using copper tubing, measure overall length of copper…
- Connect Fill Hose to Fill Valvep. 13
18. Tighten 90° elbow fitting to valve Be sure rubber washer is properly seated in fitting. Slide the 3/4" (19 mm) fitting of the 90° elbow up to the valve and…
- Drain Hose Connectionp. 13
19. Connect drain hose A B C D E A. Small clamp B. Rubber drain hose connector C. Stop D. Drain hose stop E. Drain hose Place towel under drain hose to catch…
- Power Cord Connectionp. 13
NOTE: If removing a previous dishwasher with a power cord, you will need to transfer the power cord to the new dishwasher. 22. Remove terminal box cover Using…
- Install Door Handle (on some models)p. 15
30. Install door handle A D B C A. Setscrew (in bottom of handle) B. Hex key C. Handle D. Mounting stud IMPORTANT: Do not scratch the front panel during this…
- Place Dishwasher in Cabinetp. 16
WARNING Excessive Weight Hazard Use two or more people to move and install or uninstall appliance. Failure to do so can result in back or other injury. 31.…
- Choose Anchor Attachment Methodp. 17
IMPORTANT: The dishwasher must be secured to the cabinet as one of the final steps. Prepare the dishwasher for this by attaching the 2 brackets found in the…
- Final Installation Checkp. 17
40. Open and close door
- Secure Dishwasher in Cabinet Openingp. 19
46. Double-check dishwasher alignment in cabinet opening Check that dishwasher is still level front to back and side to side in the cabinet opening. Open…
- Direct Wire Connectionp. 19
50. Remove terminal box cover Using a 1/4" hex-head socket, nut driver, or Torx® T20® screwdriver, remove terminal box cover. Retain for later use. 51. Install…
- Connect Water Line to House Shutoff Valvep. 21
NOTE: If using a flexible braided hose, replace inlet hose after 5 years to reduce the risk of hose failure. Record hose installation or replacement dates on…
- Connect Drain Hosep. 21
58. Connect drain hose Connect drain hose to waste tee or waste disposer using one of the following options: n Option A: Waste disposer – no air gap n Option…