Loading manual…
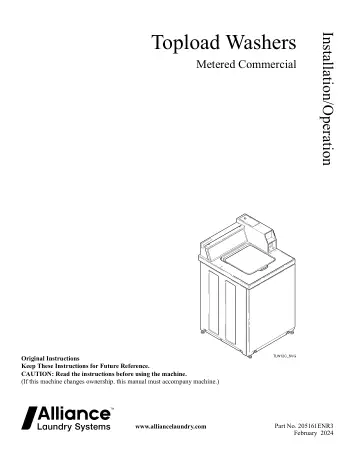
Speed Queen 3.19 Cu. Ft. Commercial Coin Drop Top Load Washer 26 Inch Wide (TV6000WN) user manual
- Type
- User manual
- Language
- English
- Pages
- 28
- Category
- Washing machines
- Models
- TV6000WN
Open PDFOpens the file on content.abt.com.
Contents
- Dimensionsp. 10
- Installationp. 11
Before You Start Tools For most installations, the basic tools you will need are: TLW2215N_SVG 1 2 3 4 5 6 NOTE: A cloth rag and all-purpose cleaner are also…
- Before You Startp. 11
Tools For most installations, the basic tools you will need are: TLW2215N_SVG 1 2 3 4 5 6 NOTE: A cloth rag and all-purpose cleaner are also needed. 1. Safety…
- Remove the Shipping Brace and Shipping Plugp. 11
2. Wipe out inside of the washer. 3. Connect the fill hoses. 4. Connect the drain hose to the drain receptacle. 5. Position and level the washer. 6. Plug in…
- Wipe Out Inside of Wash Tubp. 12
Prior to first wash, use an all purpose cleaner or a detergent and water solution and a damp cloth to remove shipping dust from inside of the washer.…
- Connect Fill Hosesp. 12
WARNING Under certain conditions, hydrogen gas may be produced in a hot water system that has not been used for two weeks or more. HYDROGEN GAS IS EXPLO- SIVE.…
- Connect Drain Hose to Drain Receptaclep. 14
IMPORTANT: The drain hose installation is a very important factor in the washer installation. If care is not taken when the drain hose is installed, a…
- Position and Level the Washerp. 15
1. Position washer so it has sufficient clearance for installation and servicing. 2. Place washer in position on a clean, dry, and reasonably firm floor.…
- Plug In the Washerp. 16
Electrical Requirements 120 Volt, 60 Hertz with 3-Prong Earth/Ground Plug NOTE: The wiring diagram is located in the control hood. NOTE: The wiring diagram is…
- Add Water to the Washerp. 17
To prevent damage to pump, do not run washer before adding at least one quart [0.95 liter] water to the tub. If the washer is run before any water is added…
- Check Lid Switchp. 17
Washer should stop filling, agitating and spinning when lid is opened during a wash cycle. TLW2101N_SVG Figure 12
- Connect Laundry IQ to Gateway (Select Models)p. 17
1. Connect machine to power source. Installation © Copyright, Alliance Laundry Systems LLC - DO NOT COPY or TRANSMIT 17 Part No. 205161ENR3
- Check Installationp. 18
1. Refer to Installer Checklist on the back cover of this manual and make sure that washer is installed correctly. 2. Run washer through one complete cycle to…
- Vendingp. 18
Meter Case The factory mounted coin meter case does not include the service door lock, coin slide (if applicable), coin drawer, coin drawer lock or keys. These…
- Operationp. 20
Instructions IMPORTANT: Prior to first wash, use an all-purpose cleaner, or a detergent and water solution, and a damp cloth to remove shipping dust from…
- Operation Instructionsp. 20
IMPORTANT: Prior to first wash, use an all-purpose cleaner, or a detergent and water solution, and a damp cloth to remove shipping dust from inside of washer.…
- Maintenancep. 23
User-Maintenance Instructions Cold Weather Care If the unit is delivered on a cold day (below freezing), or is stored in an unheated room or area during the…
- User-Maintenance Instructionsp. 23
Cold Weather Care If the unit is delivered on a cold day (below freezing), or is stored in an unheated room or area during the cold months, do not attempt to…
- Reinstallation of Shipping Materialsp. 23
You must install the shipping brace and shipping plug any time the washer is moved. Shipping Brace The shipping brace in the lid opening should be saved and…
- Motor Overload Protectorp. 23
The internal overload protector will stop the motor automatically in the event of an overload. The overload protector will reset itself in two or three minutes…
- Troubleshootingp. 25
Try these troubleshooting tips before making a service call. They may save you time and money. Washer Symptom Possible Cause/Solution Won’t Fill • Make sure…
- Contact Informationp. 27
If service is required, contact the nearest Factory Authorized Service Center. If you are unable to locate an authorized service center or are unsatisfied with…
- Installer Checklistp. 28
Fast Track for Installing the Washer 1 Remove Shipping Brace and Shipping Plug. TLW2098N_SVG1 6 Plug In Washer. TLW2289N_SVG CHECK CHECK 2 Wipe Out Inside of…