Loading manual…
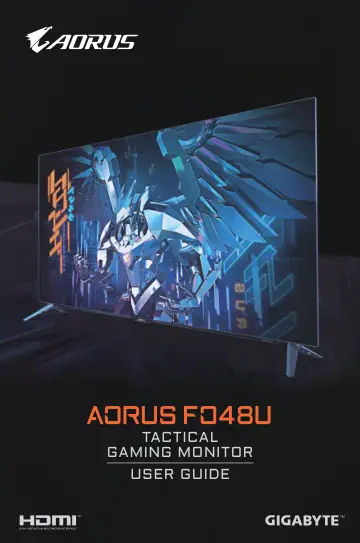
Gigabyte AORUS FO48U 48” 4K Pro Gaming Monitor (FO48U EK) user manual
- Type
- User manual
- Language
- English
- Pages
- 50
- Category
- Monitors
- Models
- FO48U EK
Open PDFOpens the file on objects.icecat.biz.
Contents
- Safety Precautionsp. 3
Read through the following Safety Precautions before using the monitor. • Only use the accessories that are provided with the monitor or that which are…
- Stability Hazard Precautionsp. 4
The product may fall, causing serious personal injury or death. To prevent injury, this product must be securely attached to the floor/wall in accordance with…
- Introductionp. 6
Unpacking 1. Open the top cover of the upper box. 2. Remove the items from the upper EPS foam.
- Unpackingp. 6
1. Open the top cover of the upper box. 2. Remove the items from the upper EPS foam.
- Product Overviewp. 10
Front View 1 2 1 Power LED 2 Control button
- Getting Startedp. 13
Installing the Monitor Base 1. Place the monitor on a table, with the screen facing down. Note: We recommend that you cover the table surface with soft cloth…
- Installing the Monitor Basep. 13
1. Place the monitor on a table, with the screen facing down. Note: We recommend that you cover the table surface with soft cloth to prevent damage to the…
- Inserting the Batteries into the Remote Controlp. 15
1. Open the battery cover. 2. Insert two AAA batteries into the battery compartment. Ensure that the batteries are inserted with the correct polarity. AAA AAA…
- Installing a Wall-Mount Bracket (Optional)p. 16
Use only the 300 x 300 mm wall mount kit recommended by the manufacturer. 1. Place the monitor on a table, with the screen facing down. Note: We recommend that…
- Making Connectionsp. 18
- Using the Devicep. 19
Turning the Power On/Off Power On 1. Connect one end of the power cable to the AC IN jack at the rear of the monitor. 2. Connect other end of the the power…
- Turning the Power On/Offp. 19
Power On 1. Connect one end of the power cable to the AC IN jack at the rear of the monitor. 2. Connect other end of the the power cable to a power outlet. 3.…
- User Comfort Recommendationsp. 20
The following are some tips for comfortable viewing of your monitor: • Optimal viewing distances for monitors range from approximately 152cm to 244 cm (5 feet…
- ASS (AORUS Smart System) of Image Sticking Preventionp. 21
APCS (AORUS Prevention Compensation System) To reduces the risk of image retention occurrence, if the monitor has been in use for more than 4 hours, the APCS…
- Selecting the Input Sourcep. 23
1. Move the Control button right ( ) to enter the Input menu. 2. Move the Control button up/ down ( ) to select the desired input source. Then press the…
- Operationsp. 24
Note: You can either use the Control button or the Navigation/Enter buttons on the remote control to navigate through the menu and make adjustments
- Quick Menup. 24
Hot Key By default, the Control button has been assigned with the specific function. Note: To change the preset hot key function, refer to the “Quick Switch”…
- Configure the Device Settingsp. 29
When the Main menu appears on the screen, move the Control button up ( ) to enter the Settings menu. Exit Move/Adjust Enter/Confirm Button Guide Gaming…
- Appendicesp. 40
Specifications Item Specifications Panel Size 48-inch Aspect Ratio 16:9 Resolution 3840 x 2160 (UHD) Pixel Pitch 0.274(H) x 0.274(V) Brightness 135nits…
- Specificationsp. 40
Item Specifications Panel Size 48-inch Aspect Ratio 16:9 Resolution 3840 x 2160 (UHD) Pixel Pitch 0.274(H) x 0.274(V) Brightness 135nits (10000K) for…
- Supported Timing Listp. 41
Port HDMI DisplayPort Timing 640x480@60Hz 640x480@60Hz 640x480@75Hz 640x480@75Hz 720x480@60Hz 720x480@60Hz 720x576P@50Hz 720x576P@50Hz 800x600@60Hz…
- Troubleshootingp. 42
Problem Possible Solution(s) No power • Make sure the power cable is properly connected to the power source and the monitor. • Check the cable and plug to make…
- Basic Carep. 43
When the screen becomes dirty, do the following to clean the screen: • Wipe the screen with your soft, lint-free cloth to remove any residual dust. • Spray or…
- Notes on USB Chargingp. 43
The following devices are not compatible with BC 1.2 of CDP mode. When the Hub is connected to a PC, these devices cannot be charged using the USB cable.…
- GIGABYTE Service Informationp. 43
More service information, please visit GIGABYTE official website: https://www.gigabyte.com/
- Safety Informationp. 44
Regulatory Notices United States of America, Federal Communications Commission Statement Supplier’s Declaration of Conformity 47 CFR § 2.1077 Compliance…
- Regulatory Noticesp. 44
United States of America, Federal Communications Commission Statement Supplier’s Declaration of Conformity 47 CFR § 2.1077 Compliance Information Product Name…