Loading manual…
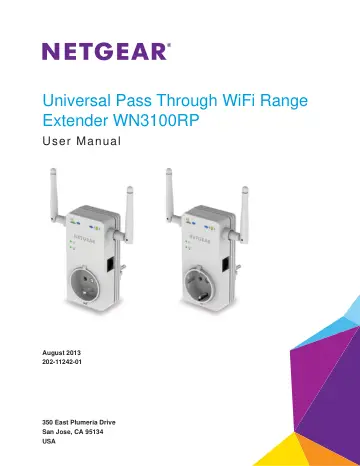
Netgear WN3100RP (WN3100RP-100PES) user manual
- Type
- User manual
- Language
- English
- Pages
- 47
- Category
- Routers & Wi-Fi
- Models
- WN3100RPWN3100RP-100PES
Open PDFOpens the file on objects.icecat.biz.
Contents
- Universal Pass Through WiFi Range Extender WN3100RPp. 1
- 1. Getting Startedp. 5
This chapter covers the following topics: • Get to Know the Extender • Hardware Features • Install the Extender • Log In to the Extender • Restore Factory…
- How the Extender Worksp. 6
The extender works like a bridge between a wireless router or gateway and a computer or wireless device outside the wireless router’s or gateway’s range. To do…
- When to Use Your Extenderp. 7
NETGEAR recommends that you connect to the extender only when your home network connection is poor. Because data traffic routed through the extender is…
- Find the Best Locationp. 7
WiFi router Client Extender Figure 2. Best location When you install the extender and join the extender network, the arrow LEDs guide you to the best location…
- Use the Pass-Through Power Socketp. 8
The extender provides a pass-through power socket. After you have the extender positioned correctly, you can plug in the equipment that was previously plugged…
- Front and Right Side Viewp. 9
The front and right side of the extender have LEDs, the pass-through power socket, and an Ethernet port. Router Link LED Left Arrow LED Right Arrow LED Client…
- Rear and Left Side Viewp. 11
The rear and left side of the extender have the product label, power connector, and control buttons. Factory Reset button WPS button Device On/Off switch Power…
- Antennasp. 12
For best performance, position the antennas pointing up. Antennas Figure 6. Proper antenna orientation
- Extender Port Connectionp. 12
Usually, you connect to the extender wirelessly, but you can connect equipment such as a computer, TV, Blu-ray player, or gaming console to the Ethernet port…
- Install the Extenderp. 14
Place the extender, apply power, and connect it to your WiFi network. Place the Extender and Power It On 1. Place the extender halfway between your router or…
- Log In to the Extenderp. 17
You can log in to the extender to use the Smart Wizard or to use the menu selections to view or change the extender’s settings. To log in to the extender: 1.…
- 2. Extender Network Settingsp. 23
To change settings, connect the extender to your computer and use your Internet browser to go to http://mywifiext.net as described in Extender Port Connection…
- Use WPS to Add a Computer to the Extender’s Wireless Networkp. 25
Use WPS (Wi-Fi Protected Setup) to connect a computer or wireless device to the extender network without entering the wireless network passphrase or key.…
- Extender Wireless Settingsp. 27
on page 27. Extender Wireless Settings You can use the Wireless Settings screen to change the network name (SSID) for the extender’s network and to set up…
- Extender IP Address Setupp. 30
The IP Address Setup screen shows whether the extender is set to get its IP address dynamically from the router or gateway (this is the most common setting)…
- Status Screenp. 31
When you connect to http://mywifiext.net and after the extender does the automatic firmware check, the Status screen displays. You can also view the Status…
- Attached Devicesp. 33
Use the Attached Devices screen to find out the devices that are connected to the extender. To view the devices that are attached to your extender: Select…
- Back Up and Manage Extender Settingsp. 34
The Backup and Restore options in the Backup Settings screen let you save and retrieve a file containing your extender’s configuration settings. Once you have…
- Set the Passwordp. 35
The user name to access the extender is admin, and its default password is password. NETGEAR strongly recommends that you set a more secure password. To set…
- Update the Firmwarep. 36
The extender checks for new firmware automatically at login. To check for firmware and upgrade if it is available: 1. Select Maintenance > Firmware Update.…
- Advanced Wireless Settingsp. 37
The extender is set up with the optimum settings. Do not alter these settings unless directed by NETGEAR support. Incorrect settings might disable the extender…
- 3. Troubleshootingp. 39
This chapter covers the following topics: • Smart Wizard FAQs • Connecting to http://mywifiext.net • Joining Wireless Networks
- Connecting to http://mywifiext.netp. 40
If you have trouble connecting, try to locate the source of the problem: • For help with passwords, see Log In to the Extender on page 17. • If your browser…
- Joining Wireless Networksp. 41
To join a wireless network you must know its network name (also called the SSID) so that you can select it. If the network is secure, you must know the…
- A. Supplemental Informationp. 42
This appendix covers the following topics: • Factory Settings • Technical Specifications • Safety Information
- Technical Specificationsp. 43
Network protocol and standards compatibility Data and Routing Protocols: TCP/IP, DHCP server and client AC input 100–240V, 0.3A (max) Physical specifications •…
- B. Notification of Compliancep. 46
NETGEAR wireless powerline products Safety Instructions and Precautions WARNING: Use the following safety guidelines to ensure your own personal safety and to…